Saturday, May 30, 2015

Inset Zipper Pouch Tutorial

'Allo! I was hoping my fabric would be delivered by miracle express so I could get busy on our diaper/tote sew along this weekend, but alas they have not. Several of you said "Yes, please!" so that sew along will certainly be a go, once I have the goods to get going. In the meantime, when I posted these bags of some of you said you'd be interested in knowing how I did the zipper, so I whipped one up and took the photos to show you. This is by no means groundbreaking, but I know how it feels to not feel like doing the 'thinking' part when it comes to sewing and to just want to get going, so here you go.

I recommend giving a quick read-through before you get going so you don't trip yourself up or do something you shouldn't, but it really is quite a simple thing.


This version measures seven inches by ten inches (finished). You will need the following:

  • one piece of exterior fabric measuring 11"w by 17"h
  • one piece of fusible interfacing (I used woven Shape Flex 101, but the craft stuff will work fine, too) measuring 11"w by 17"h
  • two pieces of lining fabric each measuring 11"w by 7"h
  • two pieces of sew-in fleece (fusible will also work--I used what I had on hand) measuring 11"w by 7.5"h. I usually use Thermolam, but I used a lighter weight fleece for this to cut down on bulk and make it not so stiff.
  • one 10-inch zipper (10 inches from metal to metal)
Iron your fusible interfacing to the wrong side of your exterior fabric according to the manufacturer's directions. Give it a few minutes to cool so the adhesive sets nicely. From this piece cut the following (it's already the right width--we're cutting height in this step. We're doing it this way to cut down on cutting and fusing multiple interfacing pieces, a.k.a. efficient laziness):
  • two pieces 11"w by 7.5"h
  • two pieces 11"w by 1"h
Now you should have this (plus some fleece that's not pictured because it's boring):


We are going to treat the exterior and the fleece as though it is one layer (unless you used fusible, and then it IS one layer). If you'd like you can lay your exterior right side up over your fleece and sew together using a narrow seam allowance. I didn't because this is a small rectangle and won't get too squidgy. 

You'll want to have your fleece, your exterior (right side up), and one of your narrow strips (right side down) all lined up along the top edge of the larger exterior piece (mind what you're doing if your fabric is directional!). Your strip won't have fleece so don't add any unless you love bulk.


Pin and sew those layers together using a 1/4" seam allowance. Press open, and repeat for your other exterior pieces. Now we're going to make a zipper sandwich. 

Take one of your exterior pieces and put it down face up. Center your zipper on this and pin in place. If you're following me exactly you'll have about 1/4" overlap on each edge. That's fine--we're trimming later. Then place one of your linings face down on this, and pin together all along the top edge.


BTW, those Clover clips are amazing and one of my favorite things ever--I highly recommend them. Now sew all those layers together using a 1/4" seam allowance. I never use my zipper foot unless I'm inserting a zipper in clothing (which is rare enough to be almost never). I use a 1/4" foot that came with my machine--I get a nice straight line with hardly any thought (and who feels like thinking on a Saturday, really?). If you need to stop and raise your presser foot to move your zipper pull out of the way, make sure that your needle is in the down position first.

Repeat for your other pieces on the other side of the zipper. You should have this for the outside:


--and this for the inside:


At this point you may be feeling the urge to trim that excess. Don't. You need that. What you need to do now is carefully press your seams up near the zipper so those folds are nice and flat. Don't iron your zipper or you'll melt it. Once you have everything pressed neatly near the zipper, we're going to toss in a little bit of top-stitching so things don't get the urge to get stuck in there at some point. I used a regular foot with the edge lined up with the zipper teeth.


If you've ever made a zipper pouch before the rest is going to be familiar. Open your zipper about half way. Don't be a rebel here. Pin all around the exterior pieces so that the right sides are facing each other. Do the same for the lining side.


This part is very important if you don't want to hear a terrible noise and break your needle. You need to note where the little metal bits of the zipper are and mark them so you'll know where they are and won't sew right into them (or try to, anyway).


My purple mark is juuuuuust to the outside of the metal bits (about 1/2" from the edge)--if I sew through or to the right of the purple all will be well. If I go to the left the consequences will be dire. 

Leaving a turning gap in the bottom of the lining, start sewing. I did this in one line of stitching, starting with the lining and sewing around the perimeter until I got back to the lining (but leaving that gap).For the lining I used a 1/2" seam allowance, veering ever so slightly to a 3/8" seam allowance once I crossed the zipper and got to the exterior. I kept going with a 3/8" for the exterior, and veered out to a 1/2" again once I got to the lining. This ever so slight discrepancy makes a big difference when tucking the lining down into the bag--it lays so much smoother with no excess bunching at the seams.

Half-inch on the lining

Three-eighths on the outside.

I greatly dislike seam bulk and try to get rid of it where feasible. So in each corner you're going to cut off a nice little triangle without getting too close to your stitches.


Then trim the rest of the exterior to about a quarter-inch, especially the sides of the zipper. Be careful there, as it's bulky and your scissors might try to balk and cut something unintended.


Now reach into that gap you left, through the zipper, and grab the exterior of the bag. Pull it back through the gap so now you see the right sides of your fabrics. Using your fingers or a small poky device (I have a bamboo point turner I use) gently poke out all four corners of the exterior part of the bag. You'll be reaching through the gap in the lining and working a little blind here, but it's simple enough.

Sew the gap in the lining shut. You can do this by machine or hand. I like to do it by hand as it's so much less obvious there is a seam there.


Shove the lining inside. But remember: our zipper is not going to be across the top. That seam where we sewed the skinny strip to the main exterior is the top of the bag. So tuck things down (it takes a little bit of fiddling--I pinch the seam and carefully tug on the lining so it moves down) and press-press-press!


I love using my clapper here as it really shows that seam who's boss. I also find it helpful to press, and then not touch it until it cools. Add a bit of flare if you like.


And that's pretty much it! Keep reading after the next pic, though.


Some of you may be wondering why I didn't cut one loooong exterior piece instead of a couple smaller pieces. Oddly, I like having the seam across the bottom. That wee bit of bulk keeps it from sagging. At the top, I did it this way as when I was working on a sample it was much easier for me to achieve a straight top of the bag when that seam was there (the skinny strip sewn to the exterior) as a guide. When it was simply just the fabric folded over I had a bit of trouble getting it to be straight, and then to stay straight when the bag was opened and closed.

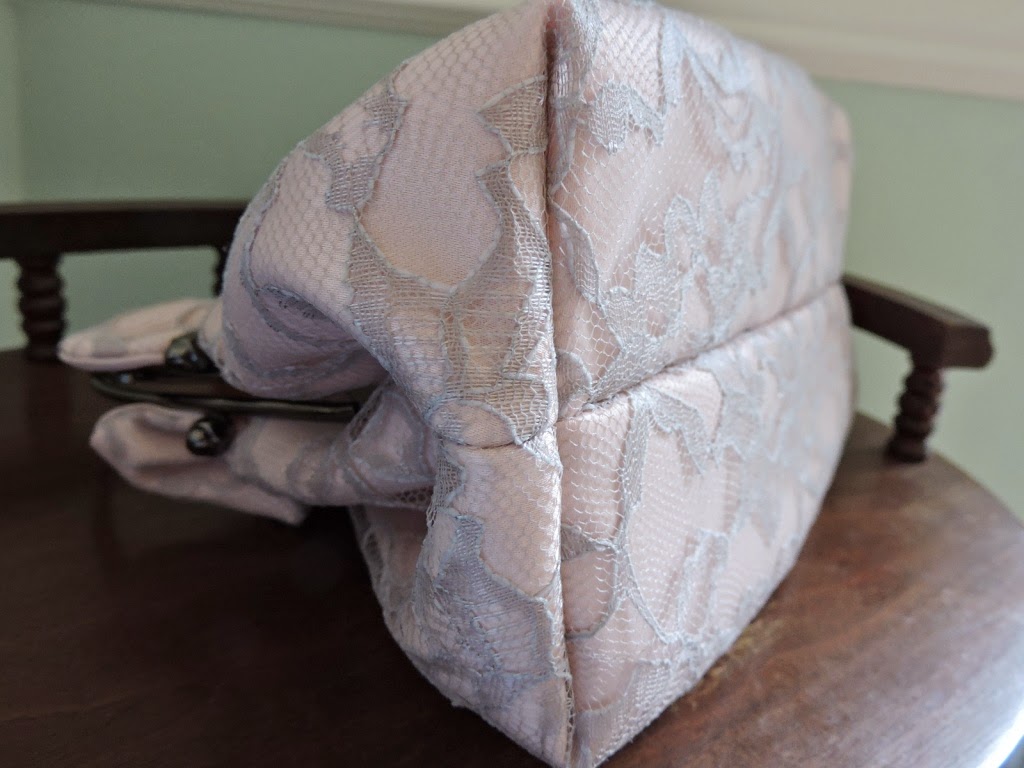
I chose to keep things plain for a tutorial, but this makes up a really nice sized clutch. So if you had some pretty satin or a bit of silk (ooo-la-la!) this is a simple design that could really show off some beautiful fabric. Have fun! And let me know if you have any questions!


Saturday, May 23, 2015

Got Weed(s)? You'd be a lot cooler if you did...

Alright, alright, alright....

It never seems like there's a baby here and a baby there--it's more like all the babies come at once and their mommies want diaper bags. I showed you my geek-inspired bag last week, and this week I've got another for you (with an order for one more that might prove difficult to bring to fruition in the requested fabrics so we'll see how that goes). But if there was an interest I might do it as a sew-along? Let me know in the comments if you think you'd be interested--keep in mind this bag is basically a very functional pocketed tote that I have just made my go-to design for diaper bags, so you can make it for any purpose, really.

So I've noticed people don't want their diaper bags to really look like diaper bags, whether it's because daddy thinks it's unmanly to carry a pink bag with teddy bears, or because mommy's taste doesn't tend towards the cutesy. Either way I get to try out fabrics and combos I normally wouldn't as they might not lend themselves well to an ordinary bag. This bag came about after my friend viewed her niece's registry, sent me the photo, and then requested her niece to take it off her registry (subtle, eh?). I tried to match the fabrics in color and feel, and felt quite lucky to snaffle up some yardage of this fabric as I'm always late to the party and want things when they're on their way out.


This fabric is from the Weeds collection by Me and My Sister for Moda. Last week I hit the jackpot with pattern matching without trying. This week I tried and it's slightly off, but the fabric is so busy you don't really notice. Normally I pull up the top edge and do a sort of faux piping with the lining, which works great when the lining and the details on the outside are the same. I didn't do it with these recent two, but I can say this--it makes top-stitching along the top so much easier without all that bulk (which is a bag demon I want to iron out--it gives me slight anxiety when I come to a bulky seam to topstitch over and I can't always say if I'm pep-talking myself or Harriet when we come to that point in the final step of this bag).


As per the usual we've got handmade piping around the gusset, and elastic pockets on the sides. The fabric is also quilted on this one (which was a huge time sucker--this would have gone quite quickly if not for that detail being added).


This one has a suspension bridge zipper in there as well. Again I've used a larger handbag style zipper and it is really so much easier to work with (and feels so much sturdier for a larger bag).


Again I made the 'bridge' nice and wide so that the bag can really be filled without any concern over the zipper busting with tension. At the same time it's not rigid so it will simply hunker down in the bag if it's not stuffed to capacity.


The straps and piping (the textured dark gray) and this dotty lining are both from Joann's. I know dots aren't everyone's cup of tea (those people aren't to be trusted, BTW), but I really feel like these are a fabulous complement to the red. Lots of elastic pockets and a wide gusset make this bag easy to organize and roomy.


I think I've made about a dozen of these bags, and on this one I hit the "Duh!"jackpot. I think there are maybe about five things I realized I was making quite difficult on myself (regarding the pockets, the straps, and the piping) that I figured out on this one to make it much easier (again I can't say how much time I saved because of the quilting I had to do but it felt easier going together so it must have saved some).

This one was a little out of my color-comfort-zone for babies, but I was informed that the mom-to-be is quite thrifty and adores handmade, so I imagine this bag will be lovingly used and cared for and have a life that extends far beyond the need to lug around diapers and such.

Up next I've got a few knits to show you--some fun socks, and a shawl/scarf (because that's what you make when summer is on the way, right?). Plus some progress on my PITA afghan (pain-in-the-dot dot dot). It's a bugger to work on as I can't sleep through it but I love it so much now that it will definitely be finished. Maybe even this year. Unlike this quilt that I also love but haven't touched (but have full plans to once my weekend social life calms down with picnics, parties, showers, and weddings).

Tata for now, and have a fabulous holiday weekend!!

Thursday, May 14, 2015

Einstein, Watson and Crick Walk Into a Post Office...

Last week my oldest friend (in length of time as friends, not age--we met in dance class when we were four. Well...she was in dance class, I was in stomp around gracelessly class) gave birth to a beautiful baby boy. At her baby shower we were chatting and her mother said "Do you know you didn't ask for a diaper bag on your registry?" To which she responded "I know. I'm asking Bethany to make me one right now." Her husband is a nuclear engineer (when I first met him I felt really witty with my "C'mon, it's not nuclear physics" quip but, as with most engineers, he was just like "Mmm hmm, OK"and didn't find me hysterical, which is how my dad the engineer responds to me, too) and wanted to make sure the diaper bag was not going to be overly babyish. Sports was tossed out as an idea, and they jokingly said "Do they have fabric with atoms on it?" I almost fell out of my chair when I saw that yes indeed, there is geeky science fabric available. After nailing down the details and getting the fabric, I got busy. I enjoyed every minute of making this. Truly.


That fabric matching on the front pocket there was pure accident. I don't think I could have done that if I tried, but it looks like I really meant it. I was a little nervous ordering the green online as sometimes things look way different and don't match in reality, but this was spot on. I did my usual elastic pockets on the sides, but didn't realize my photo was a little blurry until about ten minutes ago.


The inside fabric is just as adorable, and is an assortment of random geekery--equations, symbols, binary code, bowties and glasses.


I usually do a tie closure for diaper bags, but did a zipper this time. I had bought a small supply of purse-sized zippers to have on hand for larger bags. It was nice not to have to switch out the zip pull for a larger one and to have a little extra width to work with for the casing.


The zipper casing is nice and wide so if the bag is stuffed the zipper won't bust, and if it's not so stuffed it'll sit down a little bit. I love how that double helix worked out around the zipper, kind of creating its own pattern. I had my fingers crossed with the fabric cutting for this one as I had just enough. I had a little square left over after some gusset trimming, and I'll hold onto that for the quilt I need to get back to.


I finished this the day she had the baby and mailed it out on Friday. I asked for Monday delivery. It just got there today. It went kind of west, slightly east from there, out for delivery in the wrong town, way further west, then waaaaaay east, then back west, then finally to its destination. I tracked this thing like a bounty hunter because if they lost it I was going to lose it. Every day when it showed up nowhere really near where it was supposed to be when it was supposed to be there I would quietly rage "THIS IS WHY YOU HAVE NO MONEY, POST OFFICE! THIS IS WHY PEOPLE SHIP UPS! YOU HAD ONE THING TO DO! I COULD HAVE WALKED IT TO HER BY NOW! TWICE!" So I was quite relieved when I saw it made it safe and sound. I've said it before and I stand by it: my photo must be hanging in the post office with a note that says "Lose anything she ships and receive a pay bonus!" Because every time.

This is definitely one of my favorite diaper bags out of the many I've made at this point. So different, so fun. I'm pretty sure nobody else is going to have an atomic diaper bag. And sometimes an atomic diaper bag is necessary for the atomic bombs those wee little things can drop.

Friday, May 8, 2015

Probably One of the Most Feminine Things I Own

Recently I shared these bags that I made for my cousin's wedding. I needed a bag for myself as well, but I'm not a clutch sort of person. I like something to hold onto so that I can swing the bag at someone's head of the need arises (I mean...you never know, right?). I was delighted with this bag I had made for another wedding (I have a LOT of weddings to go to this year--be warned), so I figured I'd use some of the leftovers and another bit of a lace to make a bag to match my dress (which is silvery gray lace with a light blush lining). I had to make this right away even though I have oodles of time, because I didn't see myself wanting to work with lace again once I stepped away from it. 


The original bag pattern I used had an inset bottom. Thankfully, the lovely Liz mentioned this pattern in a comment--one with a nice, easy boxy bottom.


This is so light and shimmery--I just love seeing it. It came out much better than I thought, as I really thought I'd make a terrible mess of the lace because I was just so over it.


It's not crooked, there's just nothing in it to fill it out, and I took a chance on some interfacing that was a wee bit flimsier than usual so it's got a mild case of the flop. It made the top much easier to get onto the frame as I didn't have to fight it so hard, though.


I took my time with stitching the casing and marking and measuring, as I can't imagine the new naughty words I'd have invented if I had to rip out stitches from lace. I don't know if a stitch in time saved nine of anything, unless it was years from my life as it slid right in.


This matches my dress just right, and makes me almost excited to wear it. Almost. I'm a jeans girl through and through, and don't know if I'll ever look forward to dressing up.


I have a couple of diaper bags and a finished pair of socks to show you. My afghan is growing, and I've got a shawl on the needles in some of my fancy new yarn. My sister said to me "I don't know how you can work so much! I'd go crazy!" Which is funny, because obviously this isn't work. Amiright?

Sunday, May 3, 2015

I'm Not a Kid, I'm a Girl...

...and Friday was my birthday.*

I hate to brag but I just had the most delightful three-day weekend. I took off on Friday and set an agenda of 'whatever.' I took my car in for its annual check-up, and after that headed off to an official yarn store. I have been a yarnster for thirteen years now (five more than I've sewn) and my yarn shopping has been limited to large craft stores like Michael's and Joann's, or to online shops. This was like walking into a candy store (and with birthday money in hand I didn't hold back). I'll show you what I bought as I use it. I drove around the little town the shop was in that may have been one of the most picturesque places ever (but got no pictures because of the whole motor-vehicle-operation-in-progress thing). I ran a few errands, and then settled at home with tea, a sandwich, and some knitting (I finished some more socks). We went out for dinner and after I got home I wound up my yarn purchases on my new yarn ball winder (because I know how to party).


While that all sounds like too much fun to endure, I got to babysit my little A-train on Saturday.


This kid. For real. My heart can't take it sometimes. "You be this car, and I will be this truck, and we will drive to the chocolate factory." Just lead the way, kiddo. When he's in his little world playing with blocks or sidewalk chalk or something, he sings to himself (which is the cutest thing to overhear).


He and his Aunt Leesh sat on the front steps and shared an orange. I made up a song for the experience, but no one was amazed at my lyrical prowess. I'll let you judge. (Ahem):

Oh my orange,
Oh my orange, 
Oh my orange Clementine.
You are good and
Oh so yummy
In my tummy
Clementine.

Should I quit my day job? 

Not long after this A-train stood up and said "I have to do my business." Curious as to if there was a different meaning here, Aunt Leesh said "What is that?" And he said "MY business." He then started to pull his pants down to go on the lawn. Like the dog does. My sister was laughing too hard, so I stepped in and said "No, we go in the house to do that." I was then informed "No, I have to do it right there on the grass." After a brief lesson on the difference between dogs and humans, we high-tailed it inside to continue with the potty-training/house-breaking. 


Spending a day with a kid and not glued to your phone or the have-to list is quite liberating. You are forced to slow down and be in that moment, to watch that bug and make up stories about where he's going, to drive tow trucks to the candy factory that is apparently just off to the side of the porch, and to find wishes just waiting to be made.


This morning I woke up to a big breakfast my daddy-o made, followed by a massive closet clean-out (I even bagged up my delusional section for donating--do you have one of those? It's a small selection of clothing you swear you'll fit back into one day). I put away the winter things and pulled out the summer brights. My mom made my favorite (ravioli), and we had dessert and blew out candles and all that jazz. 


I am trying to think of the last time I had three consecutive days of pure joy from start to finish. Happy new year, indeed.

*Random Shirley Temple quote (with a little creative license)

LinkWithin

Related Posts Plugin for WordPress, Blogger...