Thursday, June 30, 2011

Quilt Along Nine Patches

First - I just want to thank you all for your super sweet comments on my Bliss quilt. And I want to say hello and welcome to any new followers (and of course to the usual suspects :) I really am glad that you stop by and read my blathering. Truly, I am. OK, enough of the mushies....

I stitched up my second block for the Sewn quilt along this week. I figure that if I make it a point to have them posted on Thursdays then I'll stay on track with the whole thing. My vacation is going to mess me up a little but I am LOVING how the red and white prints are working together, and they stitch up pretty quick so I don't think I'll have a problem catching up. The block this time was a nine-patch block. It was done with strip piecing and chain quilting to speed the process. My seams were pretty good this time--once I squared up the edges it was right on. I don't expect that to happen too often.


I am now realizing I forgot to do my final pressing on that center seam, but it looks pretty cute, eh? I ordered a few more red and white prints as I've only got scraps of some of them in my stash, so I'm excited to start adding them in. UPS tracking thingee says they should be here tomorrow. Am I the only one who obsessively clicks on the tracking number to see if it's any closer to the front door than it was an hour ago when it departed Raleigh, NC? Please tell me I'm not the only one. I feel like a stalker now....

So that's that. Next on my cutting board is a handbag for me. If I don't make it before I get to the rest of the to-do list it'll never get done and then it'll be fall, and I really don't think the fabric I chose deserves to sit on the shelf for another year (because LAST year is when I intended to make this bag). That fabric NEEDS me to do some selfish sewing...

Have a deliciously stellar Friday! Holiday weekend - woot!

Tuesday, June 28, 2011

Too Fat for the Mail Slot....

Remember the Sew Mama Sew giveaway day last month? I don't think I'd be lying if I told you that I entered hundreds of giveaways. Guess how many I won? Zero. Zilch. Nada. But you know what's better than winning random stuff from people whose blogs you're most likely not going to visit again? Winning stuff from people whose blogs you DO read (this makes it much more exciting). I won a few things right in a row so I thought I'd show them all to you in one post.

I won this little lovely over at Sew Christine. I just love the colors on that oilcloth! And the frame is one of those colored frames from Klein's in London. I wrote them once to see if they would ship to me if I ordered in bulk (it seems they just ship to UK) but I never heard back from them. Probably better that way - my plastic needs a break.

 I scored this little bunting from Helen at Serendipity Child. You could choose any word that you wanted for applique (within reason--although I still think that 'supercalifragilisticexpialidocious' would be rockin' on some bunting and I may just make one for the sheer ridiculousness of the endeavor :)  
I just happen to think that 'home' is one of the nicest words there is :)

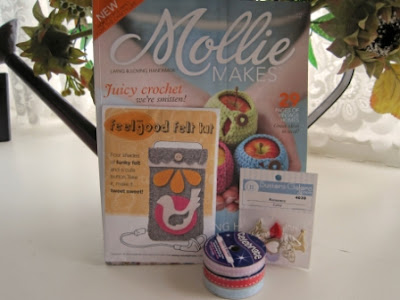
This lot came from Kandipandi's Pad. There are some ultra-romantic buttons, some adorable ribbon (some of which has already been put to good use), and the first issue of the new UK craft mag 'Mollie Makes.' I subscribed almost as soon as I turned the last page. It was pricey, but it's a delight to look at and has stuff in it that is quick and cute to make. The only other magazine I get is 'Reminisce' (because I've got that old soul thing going on) so I thought this would be a bit more fun :)

This last one isn't a giveaway - but it's an adorably fun surprise sent to me by the ever-delightful Meream (who has recently been making me wish I wasn't allergic to cats). Here's how one should open such a surprise:

 Stare at this and wonder just what could be inside. Hum "My Favorite Things" to yourself while you think about this. Shake it and squeeze it if you must, but make sure you put it down and stare at it for a few minutes more before you open it.

 Realize what it is and do a little dance of glee.

Line them up like this because from the look on your father's face you realize that people who are not Russian nesting doll fiends might not know what it is unless they're un-nestled.

Be speechless, because how sweet is that? Also, I like the way the h's are connected to the preceding letters. I am going to try to do that as my printing lacks character.

So that's that. I finished up my next quilt block, so I'll be back to share once I get some decent pics. Ta for now!

Sunday, June 26, 2011

Blissed Off

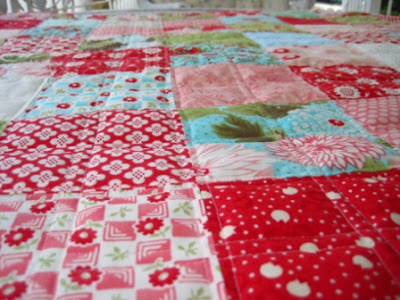
Remember my Bliss quilt I was so excited about and then it took a back seat for, oh I don't know, a few months? Well, I finally finished it (you'd think it was huge but it's just a baby quilt). I was going to free motion quilt it, but I chickened out for a couple reasons - I didn't feel like practicing again, and the size and weight of it made me lose a bit of my moxie (I didn't need it to be perfect but I didn't want to make a total mess of it). I feel more confident with free-motioning on smaller pieces, so I think I'm going to try incorporating that into some of my bags.

Sorry for all the pictures - I just loved the colors :)


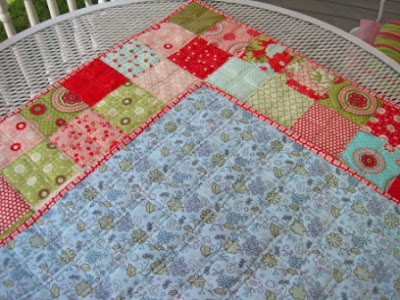
This is the backing: I thought it was more aqua than blue when I bought it. I think it goes, even though it doesn't match.


To quilt it, I just stitched either side of the seam, and down the center of each charm square using 1/4 inch quilter's tape as a guide.


Things almost got crazy while I was quilting - this is the closest I've come to sewing my finger:


Luckily it was in a spot where I could snip myself free.


This little baby is far from perfect - the thicker batting I used made my fabric pleat in a few places (despite my walking foot), and the binding is a little wrinkly in some places, but I truly don't care. I decided I have a sewing philosophy. When I make something like a bag I like it to be as perfect as I can make it (as I'm usually selling it or making it for a gift). But for a quilt I just want to go with it and sew without being stressed. If it's not horribly misshapen or sewn I'm not even going to fix it, because they're for no one but me right now. Besides, I like looking at early makes and comparing them to more recent ones to see what I've learned. And despite all of its little quirks I love it - I don't know if this will make sense but it reminds me of what summer must have looked like when my grandma was young. I don't want to use the word 'vintage' because that doesn't fully encompass it...is it weird for fabric to do that to you? I guess it's not the fabric itself, but some memory that it tickles somewhere within you...  Have a blissful Monday, folks! I'll be back with some goodies that the mailman dropped off recently.

I'm linking up here this week:

C.R.A.F.T. *** Homemaker on a Dime *** Craft-o-Maniac *** Sew Can Do *** Sarahndipities *** Pinkapotamus *** Sumo's Sweet Stuff *** Ask Anna *** Skip to My Lou *** All Things Fee *** Running With Glitter ***Today's Creative Blog *** Funky Polkadot Giraffe *** Creative Itch *** All Thingz Related *** Sugar Bee Crafts *** Homework *** Cherished Bliss *** My Girlish Whims *** Sew Much Ado *** Tea Rose Home *** Free Pretty Things for You ***  Someday Crafts *** Somewhat Simple *** Fireflies and Jellybeans *** Suzy's Artsy Craftsy Sitcom *** Momma's Kinda Crafty *** The Shabby Nest *** Creation Corner *** Iron Violet Designs *** Tatertots and Jello *** While He Was Napping *** Show and Tell Saturday *** To Sew With Love

Thursday, June 23, 2011

Cheery Cherries


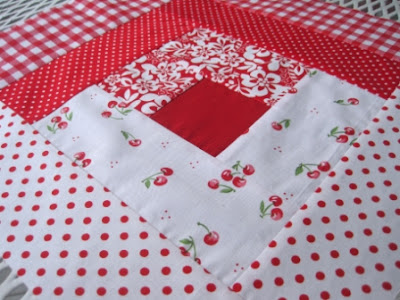
On Friday the first quilt block in the sampler sew-along (button in my sidebar) was posted. It was a simple log cabin block. I love log cabin blocks, but I've never made one. I was going to use my small scraps and go crazy-random but I didn't have enough that were large enough. I dug out my huge box of mid-sized scraps, and stared, and pulled things out, and put things back, and paced... I just couldn't come up with anything I liked. I was going to say "Dang it all, I'm not doing it!" when a piece of fabric caught my eye. And in that instant I knew not just what I was doing for this block but for the whole quilt. Red and white. Simple, pretty, happy, classic, and my favorite color combination. I played around with placement and then went traditional, with the lights on one side and darks on the other. It makes me happy to look at it:

Swoon.

 The cherries, the dots, the checks--it all reminds me of a summertime picnic.

 I read somewhere that a log cabin block is supposed to have a red square in the center. Normally I'd say pooh to that if it didn't match, but for this it was just too perfect.

My measurements are pretty good - I'm only short 1/8" either direction - not too bad. And our leader had the same thing happen, so I'm feeling ok with that. I'm not the greatest quilter, so I'm hoping by the end of this I'll be greatly improved. The only thing wrong with this block (I know - why do I insist on pointing out mistakes? To keep it real, yo :) is that I tried to ease in a strip or two that may have been a hair short - there's a little pucker to it where it doesn't lay dead flat, but it doesn't bug me because I know it will be fine once it's all together. 

Tomorrow another block goes up - I'm glad I picked my colors for the whole thing because I'm really excited now :)  And if I run out of prints it won't take me as long to pick reds and whites as it would to pick other colors.

Have a happy Friday! Back soon!

Monday, June 20, 2011

What I've Been Up To

I feel like I haven't written a real post for aaaages. I had a week of giveaway posts and a week of sew-along posts (see the tab at the top for all the directions and the pattern), but no business-as-usual stuff. But Lola and I have been churning out quite a few projects (Lola is my beloved Janome, in case you didn't know). I'm going to lump some of them into one post for your viewing pleasure.

First up is a gathered clutch. I made this as part of a graduation gift, but it had a few...moments. I had the exact amount of fabric needed for the outside - that made me nervous as that's when I always mess up. Second, I had a difficult time getting the gathers to show up well - even in a photo close-up they kind of blend in.


I put a pink band across the front, but it was just kind of eh looking. I really didn't want to take it all apart, so I consulted with one of my design experts (a.k.a. Mom) and she said to do some sort of contrasting ruffle against the pink. And then I found that lovely white eyelet ruffle in my stash.


Sorry about that icky lighting. If I had more of this fabric I would have cut it so that more of the colored flower bits were visible (there's a lot more color on the back), but working with what I had this came out pretty stinkin' cute. The thank you note said "I love ruffles and pleats and pink - how did you know that?" So yay for perfect girlie gifts!

Now, I don't know where this trend started but one of the girls I make bags for (and her mom, and her sister, and a few of her friends) always request a separate cosmetic case with their bags. One of the girls recently had a baby and wanted a regular case, and then a giant one that she could stash baby stuff in. These work up so super quick it's unbelievable, and don't really take much fabric.


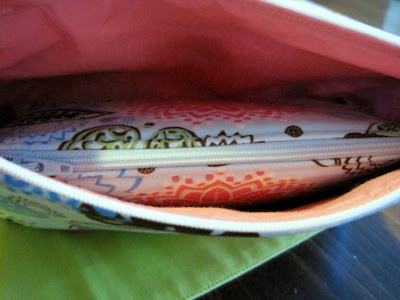
I like how even though the bottom corners are boxed the sides still come up straight instead of tapering down. It's not cut from a square - it's a simple pattern you can sketch out yourself for any size that you want.  My favorite thing about these 2 bags is how they nestle one right inside the other:


And finally--a few weeks ago one of my blogging buddies (Suze from Time Well Spent) asked if I'd make her a bag. She told me what design she liked, we kicked around some fabric choices (her style was easy to pinpoint from her blog) and we went from there. And last week I shipped this off to her:


This bag was a pleasure to make. I've never made it before in really bright fun prints - they've mostly been in more subtle tones - black and white, aqua, etc. So working with all this pink made me happy. And it all went together like a dream. Even the elastic pockets were easy (that probably has more to do with practice at this point, haha); and you all know how I feel about piping:


And I'm all for sunshine exploding when you open your bag (not literally, of course):


I also hemmed three dresses and three pairs of pants, but somehow I don't think you'll find those interesting.

I'm already behind on my quilt blocks for the quilt along (button in my sidebar), and I've got a quilt to put the binding on, but other than that I'm all caught up and ready to tackle my want-to-do list. Have a great Monday! I will personally spend it being aggravated at the season finale of The Killing.

Linking up here this week:

C.R.A.F.T. *** Craft-o-Maniac *** Homemaker on a Dime *** Ask Anna *** Sew Can Do *** Sumo's Sweet Stuff *** Skip to My Lou *** Sarahndipities *** Running with Glitter *** Today's Creative Blog *** Funky Polka Dot Giraffe *** Creative Itch *** Sugar Bee Crafts *** Pinkapotamus *** Someday Crafts *** Free Pretty Things for You *** Sew Much Ado *** Blue Cricket Design *** Tea Rose Home *** Suzy's Artsy Craftsy Sitcom *** Fireflies and Jellybeans *** Somewhat Simple *** The Shabby Nest *** While He Was Napping *** Iron Violet Designs *** Creation Corner *** Tatertots and Jello *** Be Different Act Normal *** To Sew With Love ***

Sunday, June 19, 2011

Happy Father's Day!

Happy Sunday to you all! And Happy Father's Day to all the relevant y-chromosomers out there :)

I've been trying to think of things I may have made for my dad when I was young, and I came up with nada. Other than a few cards or pictures that are long gone (or that time I was about four and put stickers on his briefcase because I thought he would just love showing it off to his co-workers at the chemical plant), I came up with one thing. A ceramic pencil holder in the shape of a pencil that I painted. That's it! Sad, I know... So since I have nothing to show you from Father's Day past I'd figure I'd give you two opposing memories - one where I remember my father as a genius and one where I thought he was NOT so smart (such are the perils of parenthood).

My brother had a set of Tinker Toys (who didn't?) that I used to love to play with as well, even though all I could make with it was the base of a car - and I used to be dead proud of myself, thank you very much. I remember one morning I came downstairs (I think we had company which is why my dad hadn't left for work yet) and he was sitting at the kitchen table with a Tinker Toy ferris wheel. It had this little hand crank thing that made the whole thing go around. I was absolutely amazed. And I think I may have gotten upset to the point of tears when he had to take it apart (because according to my mother "Where are we going to put a ferris wheel?"). I still think it was a technological marvel. But my dad has always been like that. He was the go-to man for math and technical-related issues, especially in high school. He'd get so into tutoring me on derivatives or something or other in my pre-calculus class that he'd keep going through the book and showing me all kinds of weirdo math stuff that my brain just could not process. As a matter of fact, I'm pretty sure I wanted to say "Wait...can we go back to where one plus one equals two, because I think that's where you lost me...." We always teased him that he was such a nerd, but secretly I wish I had math brain.

In this picture he had already started taking it apart... I think that's why my mom took the picture, so I'd have something to remember Tinker Toy Ferris Wheel by.

Here's the not-so-smart one (but one of my favorites). My dad is a tall guy, about 6'5. This is great for getting spiders on the ceiling, reaching things on the top shelf, and eliciting oohs and aahs from your friends whose dads were the more common, plain old 6 feet tall. As you can imagine, having your head that high off the ground leaves you open for a direct hit from cabinet doors and whatnot as well... just saying. I remember once my dad was putting some beer in the fridge - he was squatting like a catcher to put it towards the back. I distinctly remember saying "DO NOT STAND UP, DAD, BECAUSE I'M GETTING A POPSICLE." I kid you not that two seconds later he stood up, straight into the freezer door, cracking that special spot on your head that hurts like no other. And he didn't just gently rise into it; I remember more of a popping-jumping type of standing up. I'm actually surprised he didn't take the door off the hinges. Well, he turned bright red and looked at me with a "WTF?!" look on his face. And I remember standing there, staring at him and thinking "Idiot. I said don't stand up." Of course I didn't say this out loud (did I mention he had already turned red?). 

I have a brain full of such memories, those of the head-banging, fall into the swimming pool type. And the kind that are "Dad...something technical...hammer...level...measuring....math." He's always good for both types. So Happy Father's Day, Dad...and I need to borrow $20.

Make It With Me - Wavy Top Tote: Finishing

Well, here we are. We're almost finished. And the rest is a breeze. So let's get going!

Sewing the Lining Together
1. Place your lining pieces right sides together. Sew across the bottom (1/4 inch seam allowance), leaving an 8 inch gap in the middle (this is for turning the bag later). Press.

2. Pin and stitch the sides of the lining (1/4 inch allowance). Tuck the zipper out of the way because it might want to involve itself in your sewing and we just can't have that. Press as best as you can.

3. Box the corners of the bag just as you did for the exterior.

Putting it All Together
1. Turn the exterior part of the bag right side out, and the lining inside out. Open the zipper all the way. Place the exterior part of the bag inside the lining (right sides should be facing).

2. Line up the top edges (the wavy parts and the side seams) and pin generously. You may need to tuck the zipper tabs down out of the way a bit.


3. Stitch all the way around, using a 1/4 inch seam allowance. Take your time around those curves!

4. Reach in through the gap we left in the lining, and pull everything right side out. Be gentle with it.


5. Push the lining down into the bag. Press the top edge nice and neat. I use pins here to keep everything just so. Topstitch 1/4 inch from the top edge, all the way around. The side seams are a little bulky and may try to sass you, but take your time and shove it through if you have to :)


6. Sew the gap in the lining closed (I use my machine but you can do this by hand to make it less noticeable). Then tuck everything down in the bag nice and neat.

Sew on the Shoulder Straps
1. Take one of your shoulder straps and feed it through your ring (just like we did for the loop straps that we sewed to the bag). Fold it down about 2 inches and pin. Note in the picture the direction it's folded.


2. Use the three lines of topstitching on the folded over part of the strap as a guide to sew the strap to itself. Sew towards the ring until you're about 3/4 inch away, then pivot and come across the strap, creating a box with your stitching for strength.


3. Press, press, and press. The whole thing. This makes a huge difference.

Put it over your shoulder and strut around. Get the neighbors and show them your new bag. Scream out the kitchen window "I made a wavy top bag!!" Or maybe have some tea and feel content with yourself, because we're done :)

We've made ourselves an inside zipper pocket...


...and created a suspension bridge zipper closure with pull tabs...


...inserted some purse feet and a nifty gridded bottom...


...and sewed ourselves one delightfully curvy bag :)


So that's it! I'd love to know what you think - the good and the not so good. It was a lot of work, but I actually really enjoyed doing this. Depending on what you think I'd like to do something similar in the future (but not the near future--between last week's giveaways and this week's technical writing, I need to get back to "look at this pretty fabric" posting for a bit :)  I've put a Flickr group together for this sew-along - I would LOVE it if you'd pop a picture or two of your bag in it.

UPDATE: Totally forgot to mention this part. I am more than happy for you to sell bags made from this pattern in your Etsy/Artfire/Folksy/etc. shop or at craft fairs, but you may not sell the pattern itself (I know - that's fairly obvious, but there are some who need that spelled out). Also - please play nice and give a mention where you got the pattern.

Thanks for sewing along!

Friday, June 17, 2011

Make It With Me - Wavy Top Tote: Part Three

OK! So between here and here we've got the outside of the bag all concocted. You can set that aside for now - put it where you can see it for inspiration and motivation, but don't stare at it too long - we've got work to do!

Today we're going to do zippers. Ugh, I know. But they're not that bad. I don't even use a zipper foot to put them in. But if you want to leave them out, then by all means do. They're not a critical part of the bag - you could just as easily put a simple slip-in pocket on the inside instead of a zipper pocket, and you could use a magnetic snap for the closure. It's your bag - go for it! But I promise - these zippers aren't hard at all and I do encourage you to try them. Enough blahblahblah; let's get sewing.

Inserting a Zipper Pocket
** If, way back at the beginning, you didn't fuse your interfacing to the lining pieces, do that now. I did not interface my lining (except across the top where the zipper will get stitched), but I wish I had. It's a do as I say, not as I do sort of thing.You're also going to need something to mark your fabric with and a ruler.

1. Center your pocket piece on the lining piece, right sides together (I'm using a solid so I have no wrong side in the photos). Place the top edge of the pocket piece about two inches down from the top center of the lining. Make sure it's centered and straight (mine is folded up in the photo as I was measuring from the bottom to make sure it was straight). Pop in a few pins to keep it from shifting.


2. Draw a line across the top of the pocket one inch from top edge, and starting/ending one inch from each side edge. Draw a parallel line 1/2 inch down from this first line. Draw some edges so you have a long skinny rectangle. Draw one more line cutting this rectangle in half longways.


Draw the little lines you see in the picture from each corner towards the middle line (they make the little triangles you see) - I make mine about 3/4 inch long. You don't need to be ultra-precise, but do your best to make them pretty even.

3. Stitch around the outside of the large rectangle.


4. Now we're going to cut a slit along that center line through both the pocket and the lining. I use a seam ripper to get started and then switch to nice sharp scissors. Cut from one triangle point to the other, and then clip your angled lines toward the corners, taking care not to cut the seam you sewed in step 3.


5. Pull the pocket piece (all of it) through the slit you just made. It will now be on the wrong side of the lining, and look quite messy. This is where you press it into submission so that you get some nice neat corners and a delightful rectangular slit. I always get a few little wrinkles on the back, but I don't get concerned with those--they get hidden in a bit.


6. OK, get your zipper - don't get nervous now, you already did the hard part :) Lay it down right side up and center the slit over it. If your zipper is going to need trimming later you need to make sure your pull is in the slit so you don't sew off access to it (not that I've ever done that). Put a few pins in to hold it in place - you want it to be centered between the top and bottom so that you're sure to grab the entire zipper tape.


7. Now stitch about 1/8 an inch from the edge. I don't use my zipper foot - I just put the zipper towards the left of my foot and sew, using the coils of the zipper itself as a seam guide. Pivot at the corners and keep going all the way around. You may need to move your zipper pull out of the way at some point. I only pin the top edge to get started - when I turn to come back along the bottom I keep everything positioned with my fingers because that works better than pins (for me) for this part at keeping things straight. Do what feels comfortable for you. If you like a zipper foot use it. If you like lots of pins, pin away.


Check the back to make sure you caught all of the zipper tape. If you missed anything restitch. This is on the inside and nobody sees it but you, so absolute neatness isn't critical - if you haven't made zip pockets before they get easier with practice - I promise. It took me a few tries to get them down just right so don't be discouraged if it's not as perfect as you like at first.

8. Fold the bottom edge of the pocket up to meet the top edge. Pin and stitch. Make sure you have the other parts tucked out of the way of the needle. Then pin and stitch the sides. Be careful of any metal zipper bits that might break a needle. Give it a final press (and then peek inside at your lovely new zipper pocket).


Make the Zipper Casing and End Tabs
1.  Take one of your zipper casing pieces. Fold and press in the short edges about 1/2 inch. Then fold the piece in half lengthwise. Unfold, and press the raw edges towards the center crease. Then fold in half again and press really well. Repeat for the other zipper casing piece - get them as close to even as you can or they'll look mismatched. You should be pretty good at this by now :)

2. Get your zipper for the main closure (I always use extra long because I'm weird like that). Lay the casing down on one side of the zipper, sandwiching the zipper tape. Don't get too close to the coils or your zipper might end up getting caught. Stitch, about 1/8 inch from the edge (again - no special foot needed). Repeat for the other casing piece.


3. Take your small zipper tab pieces. Fold in the short edges about 1/4 inch and press.


Then fold in half, right sides and short (folded) edges together. Stitch on each side with a 3/8 inch seam allowance. Turn inside out, poke out the corners so they're nice and crisp, and press.


4. Take your zipper (with it's lovely casings stitched on), and mark a line about 2 1/2 inches from the edge of the casing - trim on this line. Do this on both sides. When you are working on the side where the zipper pull is, make sure it's pulled back far enough that you don't cut it off. If your zipper isn't crazy long and you don't need to trim, that's fine too - just be aware of where the pesky metal bits are).


5. Slip the ends of your zipper tape into the zipper tabs. Center, pin, and stitch across the end of the tab. You end up with this:


You can't see my zipper pull in this photo but I assure you I didn't cut it off (not this time, anyway, lol).

Inserting the Zipper Closure
1. Take one of your lining pieces and lay it down right side up. Lay your zipper (with its casing and tabs) right side up, one inch from the top center of the lining. Make sure it's centered and straight, and pin it in place. Then stitch, close to the edge - make sure you backstitch or it won't last too long :)


2. Position the other side of the zipper on your other lining piece - take care to match it up as best you can. This part is a little fiddly, but use as many pins as you need to. When you're finished you'll have two lining pieces connected by your zipper.


And that's that for now. The next time we meet we'll end up with a finished bag. See you Sunday!

LinkWithin

Related Posts Plugin for WordPress, Blogger...