Tuesday, May 27, 2014

Makery: A Review

I first heard of The Makery in Mollie Makes. It's a crafty workshop in Bath, England where one can go and learn how to make pretty much anything. The concept intrigued me, and the name amuses me, so when I was offered a chance to review "Makery: Over 30 Projects for the Home, to Wear and to Give" by founder Kate Smith I jumped at the chance.


The book is divided into the three title sections, with a good bunch of projects in each.


There are pull-out patterns included, as well as a handy tips section for things you might need to know. And there are a few cute projects for sure:


It's supposed to be a brooch, but wouldn't that be a great package topper for a gift to a crafty friend? Or maybe a Christmas tree ornament?


This pin cushion truck is super adorbs, but with my luck it would roll off the table and I'd be stepping on pins for weeks. It makes for a cute decoration, though, especially in the right toy truck.


And this stuffed reindeer head I find...interesting. Much better than the real thing... Definitely has some cute Christmas potential.

And now here's the part I hate to write. Would I recommend this book? I can't say that I would. If you're on Pinterest you'll have seen some version of almost every one of these projects or could come up with them yourself. I honestly found a lot of these projects to be...not so inspiring. You can find instructions for any of these things by googling, and I think that's what irks me a little. I really dislike saying something negative about someone else's work, especially something they've put a lot of effort into. But I also dislike books that present content that isn't really that original. I received my copy at no charge, but others will pay for it and without the benefit of an in-person perusal I fear they'd be sorely disappointed. 

I can't say that this book doesn't have a place. If you're just getting into crafting (or know someone who is) and you're looking for simple projects in a variety of craft forms then this book would be great to help you discover your niche. It's very pretty, nicely organized, and doesn't require materials that you'll never be able to find. It's a great jumping-off book, but if you made the crafty leap a while ago you might want to pass this one up. 

I was not financially compensated for this post. I received the book at no charge in exchange for an honest review. The opinions are completely my own based on my own experience. For my complete disclosure policy, click here.

Sunday, May 25, 2014

Memorial Day


I am guilty of it myself. I spent yesterday and this morning chopping and mixing and cooking alongside my mother in preparation for today's Memorial Day picnic. I didn't stop to think why I was doing it, just that a bunch of people were coming over and would want food at some point. I imagine if I was the lady in the above photo I would feel tremendously different. So let's all take a moment to pause and reflect on why we all get together and the folks who have made it possible for a couple hundred years now. Thank you, ladies and gentlemen, for your service and bravery. Happy Memorial Day.

Thursday, May 22, 2014

Taking it Slow

Guys? I haven't touched my sewing machine in almost two weeks. I am wondering where this...rut?...has come from. More importantly, I'm wondering how I'm going to get out of it. I have fabric that is waving at me and saying "Hello? Make us into something, please?" and I'm just all "Psh, not now." Does that ever happen to you? You just kind of don't feel like doing that thing that you love? How do you get yourself over it? Tips, please!

But here's the interesting twist--I've been doing a touch of English paper piecing. Why do I want to hand stitch, but not go the obviously more productive route of machine stitching? I hope this is the most serious problem I ever have to face in life.

I'm working on a pretty small piece but there are a fair bit of pieces to it. I bought a charm pack of 30's Playtime by Chloe's Closet for Moda to use with a pattern I bought. The wee little prints are great for a project like this, but it took some finagling to work with the small amount of fabrics I had.


I also bought pre-cut paper pieces and acrylic templates. I didn't have it in me to cut out all those paper pieces by hand, and I know in my haste to just cut the fabric and get on with it that I'd get less and less accurate as I went along. The templates made it easy to get the most out of my charms, and the cutting went along pretty quickly.


I cut and wrapped all my paper pieces before I stitched anything together. Instead of basting these together with thread I used a fabric glue stick. Oh my word, I'm converted. Soooo easy and fast. I may be speaking too soon as I haven't tried to remove any papers yet--it may turn out that clipping threads will be easier than unsticking papers, but we shall see.


Instead of using regular thread like I normally would, I'm using the above for this project (I found it on Amazon). It's so thin that it feels like I'm sewing with a strand of hair, but it is also super strong. If I have to give it a bit of a hearty tug it doesn't snap, and it's almost hesitant to knot itself up and tangle. I'm also using a long, very skinny needle, so it's making the piecing so smooth I feel like I'm air stitching. The best part is that you can hardly see the stitches.


In some spots the stitches are more visible, but still way less than they would be if I used regular thread. I now understand how people get excited about a certain kind of thread, because I tend to fall into the cranky old lady camp of "Thread's thread. We didn't have fancy thread when I was young and we did just fine" (I have no idea if anyone ever said that--it's something my brain cooked up to justify not buying more expensive thread). It's something you have to feel for yourself. It really is dreamy.


I now have two more hexagons stitched together--one in purple and one in red (both with blue centers). I had to do some careful figuring with my fabric cuts to make sure I'd be able to get enough consistency with the colors. I know you're wondering, so I'm just going to lay it out there right now that I greatly dislike sewing those little diamonds. I thought I wasn't fond of them on my last EPP project, but now I'm sure that I don't like them. I do love the hexies and stretched pentagons (called 'gems' in this shape) so I'm going to see if I can play around with those shapes some more.

It's strange--I used to loathe hand stitching. As the days pass I find myself looking forward to a bit of it. Sometimes we need to be forced to slow down just a bit, and this is a good way to do that.

Wednesday, May 21, 2014

Rainbow Pillow Cover

A few weeks ago I treated myself to a birthday present. Well...that's what I called it, because let's face it -- I was going to buy it anyway. I'm an avid follower of the Attic 24 blog, written by the inimitable Lucy. She recently came up with a few designs using some chunky yarns, which she then worked with the shop to make available as kits. I snagged a kit and then eagerly awaited its arrival from across the pond (which is an interesting sort of torture). This weekend I started working on it--the stitch that she used worked up quickly and I felt like I was changing yarn colors at the speed of light, but in a paradoxical way it felt like it took a long time to work this up. But it's finished and the rain has held off so I snapped a few shots after work today.


This is essentially just a spike stitch, but the alternating extra long and short stitches give it a really interesting texture. The yarn is soft and not scratchy, and was very easy to work with. I had finished up a baby blanket just before I started this using a G hook and baby weight yarn, so switching to a J hook and chunky yarn felt like I was working with rope and a telephone pole.


For some reason the 'yellow' that is available in the chunky Stylecraft range is a camel color and not a true yellow. I wish it was just a wee bit more yellow, but this keeps the rainbowiness of it all toned down just a little. The only crochet pillow cover I've ever made is this one, so it was my first time sewing up the sides. My, my, my were they quite the chunky thing to stitch together! I used some of my Clover sewing clips to keep it all in place and stitched as tightly as I could.

Here's the back of it. I don't know why this is the back and not the front as it's so stinkin' adorable--


I was going to sew the buttons with needle and thread but that was too fiddly, so I marked the button places with scrap yarn, and then tied them in place. It worked fine, was easy, and looks the same. The finishing of it all took me much longer than it should have because I was watching Fargo. Is anyone else watching that series on FX? I don't think I've ever so audibly watched TV before. It seemed at regular intervals I was gasping and saying to no one "Are you kidding me?" or "OH!!!!!" or "Oh my God!" I texted my sister in all caps "ARE YOU WATCHING FARGO?????" and she responded with equal vigor. I look forward to this show each week--it is so brilliantly done. So that's why it took me about seven years to sew on a few buttons--for once the show I had on was more interesting to me than what I was making.

If you're interested in making one, you can find the kit here. It's just basic chunky yarn and some buttons if you want to source it locally. The pattern is here for the stitch how-to, and here for details on the pillow cover. I've got about half of each ball of yarn left. The other project Lucy posted to use it up is a bag, but I'm not one for yarny bags (for myself--they make me feel too hot) so if you've got any ideas or funky stitches I could use I'm not above making another pillow....

I've got another project in the works, but this one is with needle and thread. See you soon!

Sunday, May 18, 2014

Blankies

A few weeks ago my sister began working on a baby blanket for a friend of hers. I didn't have anything I was working on at the time, and watching her made me want to make one (why? I have no idea). So I stocked up on some baby yarn and began hooking. And hooking. I've got one more in the works, but I've got some other work to finish first so right now I only have these two to share.

First up is a corner-to-corner blanket. I have never made one of these before, but now that I have I realize why it is my grandma's go-to blanket pattern. So fast, so easy, but really quite beautiful and much more complex looking than complex hooking (see what I did there? Hahahahaha). 


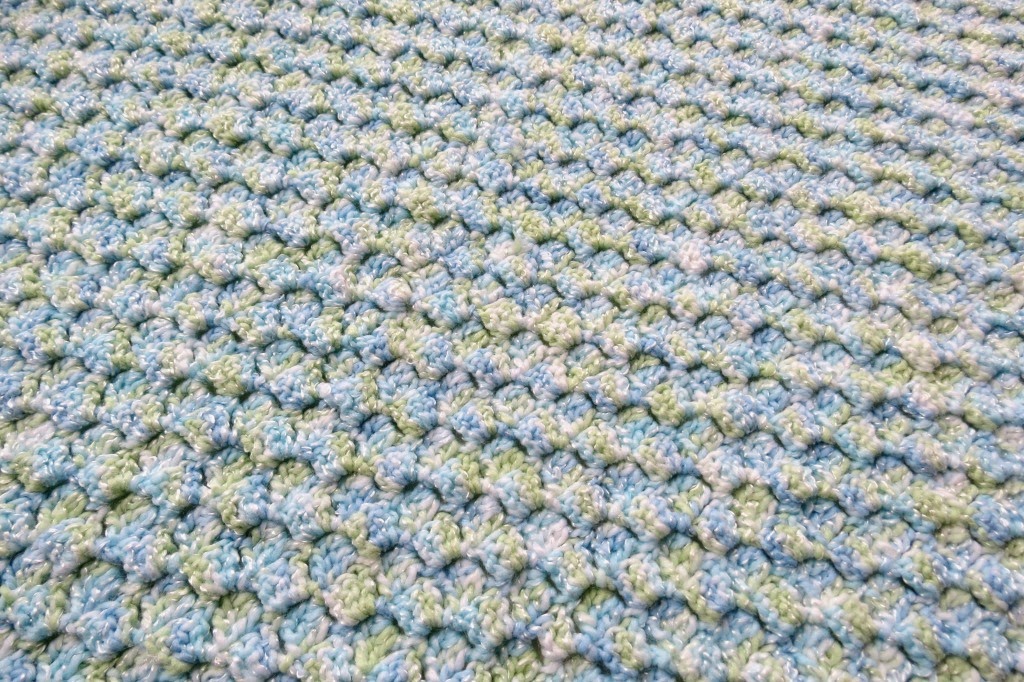
This is Bernat Baby Coordinates yarn in the Funny colorway. That delicate little thread spun through the yarn gives it a little bit of dimension. The stitch itself works up in a way that there is no right or wrong side to it, and gives it an openness without it being lacy.


This blanket is worked on the diagonal so I kept going until it was a yard wide, and then decreased. Sometimes on blankets the edges get a little wonky looking, but not this one. They actually looked fine on their own, but I had a good bit of yarn left over so I threw on a very narrow slightly-scalloped border. 


If you haven't tried this pattern yet, I highly recommend it (just google corner-to-corner crochet and you'll get links to tutorials and videos to make this either as a square or a rectangle). It's all double crochet stitches and chains, and once you get the hang of how the little blocks connect you'll be doing this in your sleep. 


I still didn't have this out of my system (and still don't) so I made another. This one was supposed to be yellow and white flowers but after numerous efforts leading nowhere I had to rethink my plan. I drew a total and complete blank, so I went with a giant granny square in alternating widths of stripes.


I love that shade of yellow! This one is made in Bernat Softee Baby in Lemon and White. No reason for using Bernat yarns, other than they were on sale. 


Even though this one is all double crochets as well I did start to lose it towards the end. It all just seemed so never-ending. I have no idea how some folks make gigantic bed-sized afghans that are gigantic granny squares. Each round is larger than the one before and just keeps going and going and going. Once this one was one yard as well, I put on a wee scalloped border to offset the squareness of it and soften it a little. 


Even though this one came out so very very different from my original plan, I absolutely love it, and I think it's because of the border. It reminds of the ripply edges of a cupcake, or some delightful rick rack. 


So that's what I've been busy doing. And here's a shameless (shameful?) plug--these are both for sale in my shop in case you know of any wee ones on the way who will need some coziness to be wrapped in.


I so enjoyed making these that I hope to keep going with it. I do love working in baby colors--soft and delicate, just like wee 'uns. If you're interested, the blue is listed here, and the yellow is listed here

Tuesday, May 13, 2014

Patchwork Double Zip Wristlet

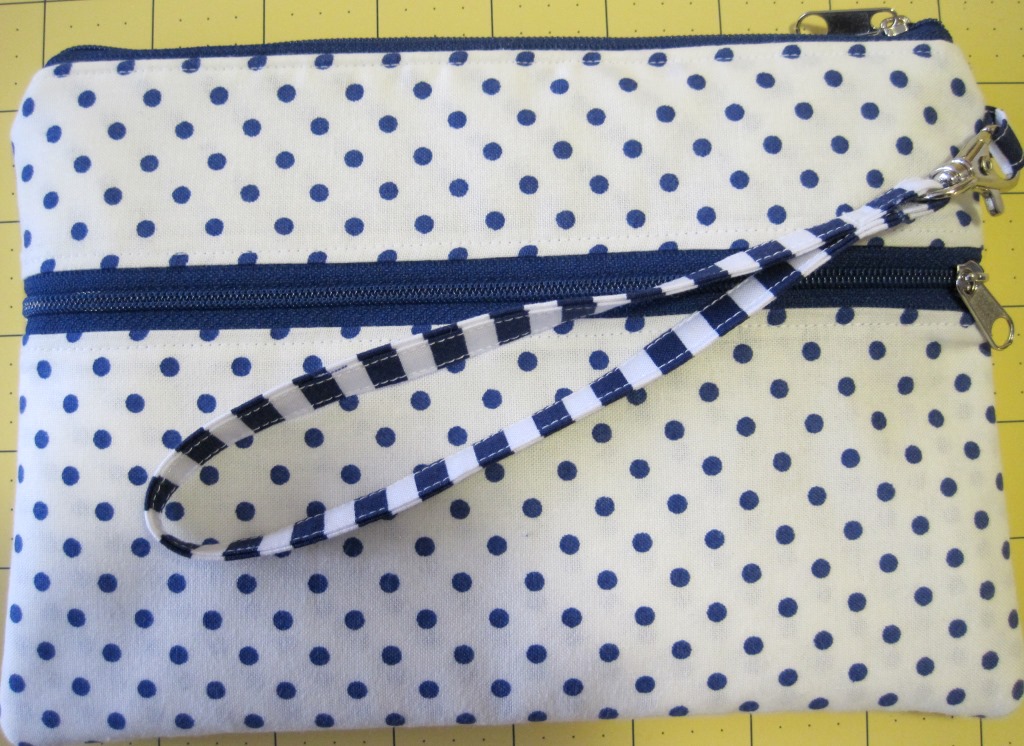
I have been promising my mother a new wristlet for a looong time. I was supposed to do it in the fall but didn't, and then lost my motivation after the holidays, so she's been using this one for a while (I picked those fabrics with her in mind, knowing I'd be giving it to her afterwards).


After a year of constant use, it only needed a spin through the washer, but I wanted to make a new one out of one of these faux patchwork fabrics. I made this on Mother's Day in the morning, so when I tell you it's a quickie from start to finish (including quilting the fabric) I'm not lying. You can find the tutorial here. Isn't that terrible, making a gift the day you have to give it? But this wasn't really a gift, it was just a deadline I set so as to be sure to get this done. I had her real gift in hand in plenty of time. I know you folks worry about these things.

For this one the only difference is that I pre-quilted my fabric, and that I switched the side that the zipper pulls are on when it's closed. I am so in love with how these fabrics look when stitched into something, especially cute little purses.


I quilted on each side of those fake seam lines by lining them up with the edge of my presser foot. I am just now noticing that I should have trimmed my pieces more strategically so the top and bottom halves lined up better, but ain't no one gonna notice that.


I have had that pinky-red lining fabric in my stash since I made this bag. I always hung onto it when I did any destashing as I knew it had to come in handy someday, and it finally did.


I know I've beat this point to death, but look how neat that zipper looks sewn in with a quarter inch foot! I made a cushion cover over the weekend and couldn't use that foot, so I gave my zipper foot a try. We're still not on speaking terms. I think the only time I've used that foot successfully was when putting in an invisible zipper (because that foot doesn't like me either :)  A quarter inch foot isn't very pricey, so I recommend getting one to use as a zipper foot. OK, I'll stop mentioning it. I just can't get over the straightness of it!


And there's your obligatory hardware shot. From start to finish I think I was able to finish in about two hours (and that includes checking my own tutorial for the measurements I used). So if you need a quick gift this would be a good one (and it uses less than two fat quarters--I've got enough left over for a little something else).

Did you whip up any gifties for Mother's Day? What did you make?

Sunday, May 11, 2014

Happy Mother's Day!


When I was younger, and I mean a LOT younger, maybe about eleven? I was lying in bed one night, thinking about the future (I was always a bit precocious when it came to such matters). I was never a cross-the-bridge-when-you-get-to-it kind of person until I was much older, so it seemed to my child mind that decisions were set in stone. I started to cry quietly, and when my mom came in to kiss me good night I told her "I don't think I want to go to college. I think I just want to be married and have kids." She hugged me and told me not to worry about any of that until the time came. On the night of my thirteenth birthday, again she found me in tears in bed (this time because I didn't want to grow up). I can't promise that it didn't happen again towards the end of my teens. I have always had this thing about the passage of time--it saddens me like nothing else. Home movies can reduce me to tears if I think too much (even when watching my brother dance his "beat-its out").

That must be the hallmark of a happy childhood--its home being in the long past one of the saddest things you can think of. And strewn liberally throughout my memories of childhood are images of my mother. My mother waiting for us at the door after school. My mother mixing up our mugs of chocolate milk for our nighttime snack. My mother quizzing us for science tests, or making us rewrite our sloppy spelling homework that we erased so hard the paper tore because neatness counts. My mother talking us through emotional moments like not wanting to grow up, or when that darn bosom was going to start to grow because everyone else's had. The usual stuff.

I don't have children (and as I had another birthday last week I wonder if I ever will), but I know that if/when I do that I want to be a mother just like mine is. Just simply full of love. So that must be the hallmark of an excellent mother--wanting to be just like her, and wanting to somehow break all laws of physics to go back in time and stay a kid forever because she's just so darn good at being a mom.

So, to my mother, and to all you mothers out there, happy mother's day. My sentiment comes late, but it is no less true and heartfelt even at this late hour in the day. Cheers!

Wednesday, May 7, 2014

Faux Patchwork Wristlet

Back in this post I had shared with you all that I received a little bundle of fabrics from Penny Cottons. I loved the look and feel of them so much that I ordered more before I even cut into the original set. This time I ordered a set of faux patchwork squares. They have been quietly taunting me while I have quietly been avoiding my sewing machine. Do you ever get into a rut where you just don't feel like doing that thing you know you love doing? On Sunday I told you I was going to spend time with Harriet (my sewing machine) but that was a lie. However, between Monday night and last night I did set to and now I have a super adorable wristlet that I just love.


I did some simple straight quilting lines to add to the patchwork effect. I couldn't decide on a color so I eeny-meeny-miney-moed it to decide between red, pink, or white. I'm not kidding. Sometimes I think if people ever saw my decision making processes they'd refer me for a mental examination.


See how neat that zipper is? I used my quarter inch foot to do that. At times my zips are a bit wobbly. They always turn out that way no matter what. But I saw the quarter inch foot tip somewhere (still can't remember) and have been doing that almost exclusively ever since. My zips have never been so delightful, so if you're not on speaking terms with your zipper foot you might want to try it this way.


Now isn't that adorable? I had bought a Vera Bradley wristlet on super clearance years ago (pre-sewing) and used it as my wallet. I could cajole my phone in there too. But when I got a new phone last year I realized I'd need something different as my new phone is ridiculously tall (something I didn't realize when I got it) and didn't even come close to fitting inside. So I sketched up a pattern using my own directions, and stitched it on up.


I'd be telling you lies if I told you that this was totally easy. I thought sewing down the ends with the zippers would bug me but that went smoothly. It was making the boxy sides that nearly did me in. There was so little fabric to work with in there I really had to pin well and go maddeningly slow. If I were to make one like this again it'd be a wee bit wider, that's for sure (this one is one inch).


Were you doubting there'd be red and white polka dots in there? I added a small pocket to the inside but I wish I hadn't. I don't really care for it as I cobbled it together from a scrap and wish it was larger. I actually wish now I had put a wee zipper pocket in there. That just goes to show you that sewing, even if it's the same sorts of things you've sewn before, can be a continuously evolving process that really can be so worth it as you're guaranteed to get exactly what you want.


This will largely function as my wallet as I don't keep much in there anyway, but my phone does fit in there perfectly for those quick jaunts out for yarn or thread or I guess food or something where you don't need to lug all the usual stuff. Which is exactly what I wanted. I love opening my bag and seeing this delightfully cheery little purse, sitting there all cute.


I think my favorite part is how the strap looks like I pieced together all these tiny bits when I did nothing of the sort. One of the delightful things about faux patchwork--added impact for zero work.

The only thing I'd change about this (other than the lining pocket) is that I'd use a thinner fusible fleece. I used Thermolam Plus and it was a wee bit too thick and stiff for something of this size, especially since I also applied some woven fusible to it (I want this to last me a while). If you'd like to make something similar, my finished measurements were about 3.5 inches high by 6 inches wide, by 1 inch deep. You can use my instructions here to sketch yourself a pattern, and this tutorial to sew it all together.

And now I have a confession to make. In a moment of complete irrationality and laziness, I almost bought a Vera Bradley wristlet (instead of making this one). I know, I know. Why would I do that? The worst part is that I picked a fabric pattern that I disliked the least--not that I liked the most, please note. I was told that had I gone through with the purchase I would have had to have found new people to eat lunch with (at work) and that my mother would be furious with me and would tell on me to my sister, who would be extremely furious. I didn't want to risk all that collective wrath, so I figured I'd better get my rear in gear and start stitching.

One final thing--I have not forgotten one bit that I promised you a sew-along for this toiletry bag. I've got my fabric ready, but the hold-up was the interfacing. I finally got my delivery this week so I'll be getting that all together for you. I'll go the usual route and give you a supply list before we start, and then break it down into about three posts so that it doesn't get overwhelming. I'm shooting for June for this. Sound good? Good. See you soon, kids!

Sunday, May 4, 2014

Mellow Yellow Mandala

Good Sunday morning to you! I'm hoping to spend some quality time with my sewing machine today, and if all goes well I'll hopefully have a new wristlet by the end of the day. It would really help me out if you all crossed your fingers and toes to make that happen--I've been super sewing lazy of late and I need to get out of that rut. But it's not like I've been completely lazy. My crochet hook has been some doing some super twirling and pulling through of late. I decided to start a baby blanket for no reason other than that my sister is making one for a friend of hers and it made me want to make one, too.

Last weekend I got into a bit of a flower-making frenzy, and I just wanted to keep hooking. Lucy had posted a link to a mandala which looked fun. I'm not sure what a mandala is, but to my mind it looks like a doily. My mom has been asking me for something to put in the center of her super-big kitchen table and I've been woefully neglectful, so when she said "You can make me something out of that yellow" I thought I'd give a mandala/doily a crack.

Let me start by asking this question. How in the h-e-double did ladies used to sit around crocheting doilies and tablecloths with small steel hooks and tiny threads without going quite mad? I used a G hook and DK weight yarn and felt slightly crazy at times. After much stitching, a little head-scratching, and a teeny bit of googling I had a lumpy wrinkly mess and I thought "Ohhhh I might lose my temper." But all ended well and now here it is:


To make it lay flat I pinned it to my ironing board, hovered the iron a wee bit over it, and shot steam at it. The fibers relaxed and kept their shape when unpinned. The thing with acrylic fibers is that when they get wet they relax. Steam is just really hot water, so the fibers all go "Ahhhhhhhh" and stay where you put them, wonderfully soft and touchable (as fresh stitches in acrylic tend to be a little stiff). There was absolutely no hope of this laying flat or looking anything like a circle before-hand, but afterwards it looks like I'm really awesome.

I did have one little hiccup, but in something of this intricacy I wasn't frogging a whole round so I kind of just fudged it in. I'm not sure where it is, to be honest with you. If I had gone crazy and blocked out all those chain spaces it'd be more apparent. The center is my favorite part--


This would surely work well in a plethora of colors, but my mother's taste is much more simple and muted than mine, so no color riot here. A vase of daisies would look right at home here, eh?

OK, so I just looked it up and a mandala is a Hindu/Buddhist representation of the universe, and is loosely defined from Sanskrit as 'circle.' Wikipedia has a good bit of info if you're interested in reading more.

See you soon!

LinkWithin

Related Posts Plugin for WordPress, Blogger...