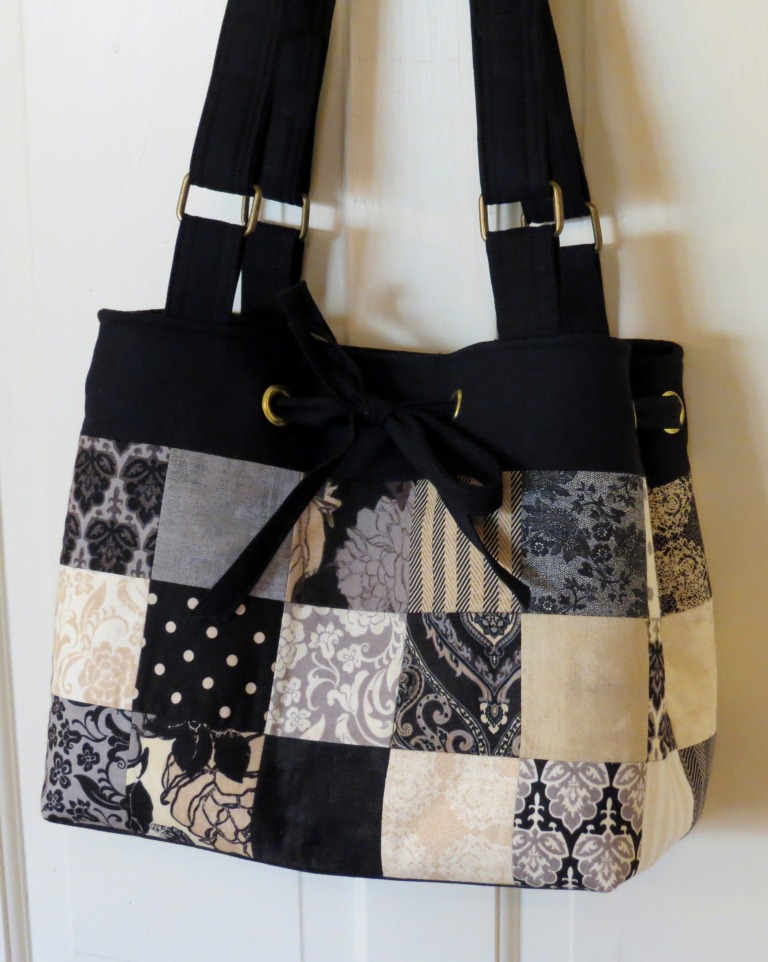
When I make promises to have a tutorial/sew-along for you guys, let's assume a lengthy lead time will be involved. I thought I'd have this done for you a while ago, but time flies and life happens and here we are in April already. But I made the bag and took the photos today, so now I just have to write up the instructions and we'll be all set to make one of these:
The version we're making is the above, but if you want to make yours patchworky--
--I'll tell you how big to cut your squares so the measurements work out the same.
In this sew-along (which I'll break into manageable parts, posted every other day) you'll learn:
- how to insert a magnetic snap securely
- how to insert grommets
- how to use rings for your purse straps
- how to insert a bag bottom to give your bag some support, and
- how to insert an internal zipper pocket
The best part is that this bag is indeed quite simple and will give you some skills you can incorporate into other creations. Also--no pattern pieces. We're working with all rectangles and squares. So that I have time to write everything up and you have time to get things together I'm going to give you the supply list now so we'll be all ready to go (but of course everything will be available to you if you can't join us right now but still want to sew the bag--all the info will be on the sew-along page).
You're going to need:
- 1/2 yard of focus fabric for the outside panel and the inside pockets (because contrast is fun). If you're making it patchworky, you will need a total of 42 pieces that are 3 inches square, plus some larger pieces to use for the inside pockets. I'm using quilt-weight cotton.
- 1 yard of contrast fabric for the lining, straps, drawstring, and the contrast pieces on the top and bottom of the outside of the bag. Again, I'm using quilt-weight cotton.
- 2/3 yard of 45 inch wide fusible fleece (I use Thermolam Fusible, but use what you can get your mitts on)
- 1 yard of 20 inch wide woven fusible interfacing. If you can only get the craft weight of interfacing that will work OK too--just don't get one that's too heavy. Also--if you're using a heavier weight fabric you can omit this.
- a nine inch zipper to match the lining (or to contrast with it, because that's nifty looking)
- four rings that will hold a 1 1/4 inch strap
- one magnetic snap
- #8 3/8" inch grommets and tools to insert them. I am using a pair of grommet pliers, but the grommet tool that you whack with a hammer works just as well. I don't have that so I won't be able to show you but everything else will apply, and the directions are usually on the package.
- a gridded bag bottom (I use a piece of plastic canvas--you can get a couple bottoms from one piece).
- basic sewing stuff: coordinating thread, scissors, pins, hand sewing needle, something to mark with, seam ripper, ruler
UPDATE: I bought everything at Joann's, so if you've got that or a Hobby Lobby near you, you should be able to find what you need.
UPDATE #2: What, you want finished measurements too? :) It finishes up at about 12 inches wide, about 10 inches high, and 5 inches deep.
I have two simple rules before we start. First--don't laugh at the sad state of my pressing surface. You'd never believe it was sparkling clean a few weeks ago, but it's all discolored now. Second, you have to accept my apology for the sorry state of my nails. I didn't realize how badly they need tending to until I was looking at the photos. Also, the pictures aren't as grand as I thought they'd be in my head. My sewing area does not have good lighting (even when the sun is shining, which is the lighting I was waiting for to take these photos), so while the pics may not be pretty they're totally functional and show everything you need to know.
Now, get going! The first set of directions will be up Monday, April 15th. Please join in the fun, and spread the word. See you then! Thought I won't complain if you come back and visit before then :)