
You don't need much to make this tote. I used less than a half yard for the exterior, and the same for the lining. I used pre-made handles to make it even easier. I buy most of my stuff at Joann's, and they've really upped their selection of strapping and belting and the like. They have a lot of colors and materials, and I don't think the price is too bad (especially with those lovely coupons).
For this version--

I used a home dec remnant and a muslin lining, with an odd bit of cotton belting centered on the side seams for the handle ('centered' being a relative term as you can see in the photo :)

Then I got excited and made a few more out of some stash fabrics and a length of webbing/strapping/whatever it's called I had on hand. The strap is nylon, and the fabrics plain cotton. Because I had more for the handles, I decided to do a double-handled bag, which is what I'll be showing you how to do.


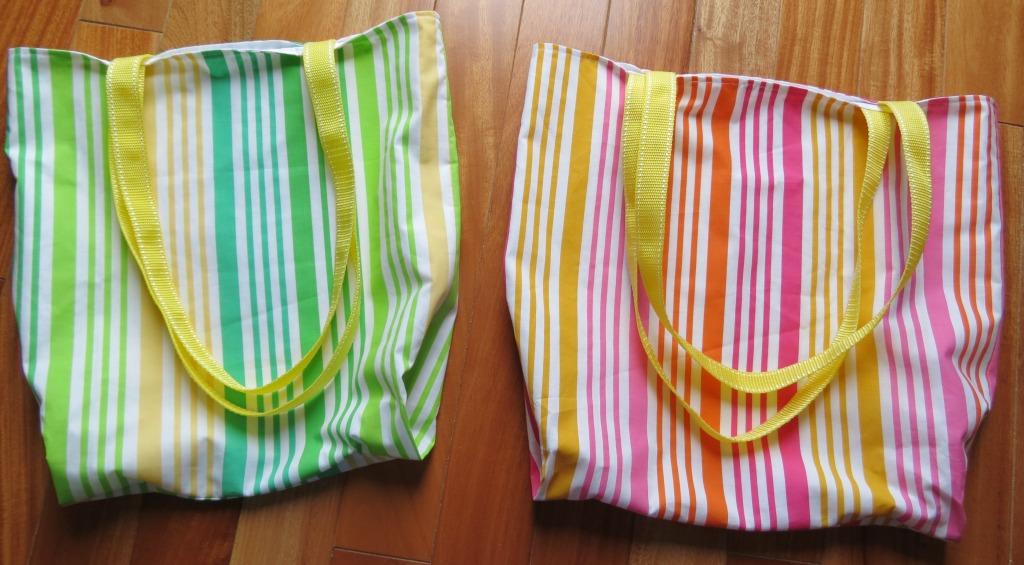
I didn't press them yet, hehehe. But those colors are fun and summery and citrusy and I loved setting the rotary cutter to them (in a completely non-sadistic way, of course). You may have noticed the one on the left is a little smaller than the one on the right--I was playing around with sizing, just to see. We're going to make the bag on the left, but I'll give measurements for the other too, in case you want it a little bit wider.
One note: I used a braided pre-made handle for this. I wouldn't recommend using that if you're a newbie, as the ends unravel and it can get quite fiddly. If you DO use it, wrap the ends in scotch tape and keep them that way until the last possible moment. OK, now on to the fun.
* * * * * TUTORIAL * * * * *
Gather your supplies. As stated above you'll need a half yard each of an outer fabric and a lining, and webbing/belting/strapping for your handles. If you're making a single-handle version you'll need a piece about 27ish inches long (less if you like a shorter handle, more if you like longer). For the double-handled version, you'll need two pieces, each about 25 inches long. You'll need a ruler, and basic sewing supplies.

From both the outer fabric and the lining, cut 2 pieces 16 inches by 16 inches (if you'd like the slightly wider version cut it 16 by 18 inches). Take the outer fabrics, right sides together, and sew each side with a 3/8" seam allowance, making sure to backstitch at each end. The top and bottom should still be unstitched. Press the seams flat (we'll press them open later). Grab a ruler and your pins. NOTE: I'm showing the lining in the photos below as it will be easier to see what I'm doing.
Fold over each side as shown below--

Measure 2 inches from the seam (NOT the raw edge), and put in a pin or two to hold in place.

It should look like this:

Sew across the bottom, 3/8" seam allowance, backstitching and all that jazz. Now you'll want to iron the seams open as best you can on all three sides. For the sides I used a small ironing board. For the bottom I stuffed a towel in to give me a surface to iron on. We're only going for a neat appearance, not perfection.
Now follow the same steps for the lining, but you must remember to leave about a 4 inch gap in the bottom for turning the bag later on.
Take your strap material and your outer shell. Turn it right side out. Measuring 3 1/2 inches in from each side seam, clip or pin your strap in place.

Stitch down your straps about 1/4 inch from the top edge. I go over mine several times, just to make them more secure. Make sure your handle isn't twisted when you tack it in place.
If you're only using one handle, do the same as above but you don't have to measure. You just center your handle over each of the side seams, making sure it's not twisted. You should now have the outer shell with the handle(s) attached, and the lining with a gap in the bottom.

Place the outer shell inside the lining, right sides together. Match up the seams, and pin around the top. Stitch around the top with a 3/8" seam allowance, making sure to backstitch.

Reach inside the gap left in the lining, and coax the rest of the bag out through it. Be gentle with it as you don't want to split your seams.

Pin the gap in the lining (with the raw edges tucked inside) and stitch shut, getting as close to the edge as you feel comfortable stitching (and don't forget to backstitch :) Shove the lining down inside the bag.
This final part is optional, but I always do it. I like the look it gives, and it gives a little extra bit of stability too. Topstitch around the top edge of the bag, about 1/4 inch from the edge.

Your bag is done, but you may be thinking "Why does this look slightly odd in the corners?" You'll need to coax the corners into shape with your fingers. Poke in the center, and then give a tug on the edges. It should look like this:

You can give that section a press if you feel like it. Now you'll need to convince the lining to get in place too. Do pretty much the same thing until it's lying nice and flat--see the awful picture below :)

I stick my iron down in the bag to convince those corners to stay put. Now take that bag with both hands and give it a sharp whip (like when you're trying to get a trash bag to open fully). Everything should be settled in place. It lays flat to fold up, but when you put things into it--bam! Flat bottom.

I know, very wordy for something I'm calling "insanely easy" but I'd rather err on the side of thoroughness for newbies or for those who may not be fluent in English (I've hopped to many an international blog and only been able to figure things out by their pictures--something I never gave much thought to before). Please let me know if you have any questions or if something is unclear. If you make one or several I'd love to see them in the Flickr group.
Have fun!!! Stop back next Sunday for a one-yard tote--we'll be boxing corners, but using a different method. And I'll show you how to make handles too!
Linking up here:
Under the Table and Dreaming*** Skip to My Lou *** Pinkapotamus *** Ask Anna *** Sew Can Do *** Craftomaniac *** Homemaker on a Dime *** C.R.A.F.T. *** Sarahndipities *** Today's Creative Blog*** Creative Itch Boutique *** Funky Polkadot Giraffe *** Chef in Training *** Tip Junkie *** My Girlish Whims *** Sew Much Ado *** Free Pretty Things for You *** JAQSStudio *** Tea Rose Home *** Pincushion Creations *** Someday Crafts *** Somewhat Simple *** Fireflies and Jellybeans *** Suzy's Artsy Craftsy Sitcom *** Creation Corner *** The Shabby Nest *** While He Was Napping *** Tatertots and Jello *** Be Different Act Normal *** To Sew With Love *** Sugar Pink Boutique *** Craftionary *** Family, Home and Life

Great Tute kiddo. I will be coming back to have a better look at this!!!!
ReplyDeleteHugs,
Kris
I learnt a trick recently - use clear nail polish on ends you don't want to fray or unravel.
ReplyDeletelove the fabrics.. so sommery..
ReplyDeleteI LOVE the bag handles (I am such a nerd...), will browse online to see if I can buy any :-)
ReplyDeleteHave a great Sunday!
Esther.
This is a nice tutorial, thanks for all your clear explanations. I just discovered your blog a couple of weeks ago when in my yahoo group we decided to do a sew along with the pattern of the Wavy bag, since then I visit your blog frequently. Thanks for this wonderful tutorial, I love this tote, this is a beautiful project, I like the idea of sewing the corners of the tote in this way. Thank you. Marisa.
ReplyDeleteReally cute material and clear tutorial! Thanks so much for sharing your ideas!!
ReplyDeletesue
legato1958@AOL.COM
I love this bag and have never made the corners like this so will be out for some fabric to make it. Thanks for your lovely tutorial.
ReplyDeleteThank you for sharing your expertise with us. Your instructions and photos were nice and clear and I made one from start to finish in just a couple of hours (including auditioning fabrics and you know how long that takes!). Thank you!
ReplyDeleteOh these are so nice! I on a mission to make friends with my sewing machine this year. I've made a pillow....this tote is next on my hit list! Thanks for giving such a great tutorial for me to follow. Saw you at Whimsy Wednesdays and am happily following you via GFC.
ReplyDeleteSo cute and you make it look so easy. I have some vintage pillowcases I've just been waiting for the right project. This is it.
ReplyDeleteHey Bethany.
ReplyDeleteI love the red & white material. It is so pretty and bright.
Thank you for sharing with us.
Have a good rest of the week.
Lois
I love the red and white bag - so fun!
ReplyDeleteThanks for linking up at Flaunt It Friday! Make sure you become a follower of Blissful Bucket List so that we can continue to share ideas. :)
ReplyDeleteSarah@
www.blissfulbucketlist.com
help! I don't understand the folding in 2" part on each side. Where do I sew????
DeleteWould love to try this one!
Tracey
Hi Tracey--
DeleteAfter you fold in the 2" on each side and pin it in place, you sew one seam straight across the bottom of the bag, over the folds and everything. Doing the flat bottom this way enables the bag to fold flat but still have depth. You have to fiddle with the corners just a little bit to get them to lay just right, but it's more a matter of wiggling the fabric into place than anything too technical. You do the lining the same way, but you have to leave that few-inches-gap in the bottom for turning it later. I start at the edge, sew across the first fold, backstitch, then lift the needle, scoot the fabric forward a few inches, and then sew across the rest of the bottom and the other fold (for the lining!! - for the outer part you just sew straight across). Hopefully I've helped you out here! Let me know if something still isn't clear!
Bethany
Wow, these totes are incredible! You make it look so simple! :) Have a wonderful weekend!
ReplyDeleteSUPER CUTE! Crossing my fingers you'll share at my party! Saturdays at Seven!
ReplyDeleteXO, Aimee
Love the fabric you used. So fresh!
ReplyDeletethis turned out so pretty and easy to do, Bethany! thanks for sharing, girl! I am totally featuring this today. have a fab weekend!
ReplyDeleteHugs,
Lelanie
to-sew-with-love.com
tocookwithlove.com
villaportillo.blogspot.com
Bargains at http://www.RosemontTextiles.com Your needs for after-market seatbelt webbing and seatbelt seconds are sure to satisfied. See us now!
ReplyDelete