Tuesday, December 13, 2011

Sprinkles and Drizzles

It's that time of year when there's too much chocolate, too many cookies, and yet...never enough of the two. I was doing pretty well on my calorie-counting diet, but for December it mostly gets tossed out the window. I have no will-power. There's no way I will ever be able to avoid all that sugar and those yummy munchies. Unless everybody adds raisins and black licorice to everything. Because then you can have it all...

To make matters worse better, on Sunday sister Alicia and I (minus sister Rachel this year--who said she was coming but changed her mind, and then changed her mind back and came for dinner after the work was done, but that's neither here nor there so why even mention it?) opened up our annual one-day confectionary in the kitchen, and put together oodles of yummy chocolate covered pretzels. We have the operation down to a science, between the melting, dipping, sprinkling, and drizzling, not to mention prep and clean-up.

So you start with all this stuff...


...melt and dip, adding sprinkles and drizzles along the way....


...being careful not to drop any because dogs can't have chocolate (and I know this is white chocolate, which isn't chocolate but is technically buttercream (forget where I read that) but why take chances? And it's less for us anyway...


...and then when you're done you have pretty, festive, yummy treats that might make it in to work on the sweets tray....might make it in.


Mmmmmm.....I heard my dad mention baking the other day...yes, please!

Sunday, December 11, 2011

O' Christmas Tree

This weekend our home obtained that loveliest of Christmas symbols, the Christmas tree. The economy and crazy prices being what they are, we had to downsize and get a smaller tree this year:


Obviously a little Christmas miracle was needed. Good thing I just invested in some magic Christmas socks:


And we had some magical ingredients on hand:


True magic can't happen until you take a few sips of tea sweetened with peppermint mocha creamer (I know--mocha flavor in tea? But yes!!! Yummmmmyyyyyy!).


Voila!!! One super-magical Christmas tree! It's a little skinnier than last year's (but it's quite tall). There's one odd branch that sticks out towards the right. Even though mine was the sole vote for keeping it, majority did NOT rule, and so we clipped little birds to it. It is now my brother's worst nightmare of a tree branch (but he doesn't know it yet):


It has been declared (officially) the nicest tree we've ever had. Until next year when we say the same thing. And just because I figured out how to take blurry-light pictures (OK - I didn't figure it out scientifically...it happened when I forgot to turn off the macro setting):


And just because my sister said she does NOT feel like looking at a bunch of pictures of blurry lights:


But I'll spare her the rest. I'm not going to mess with the lady growing the baby, bwahahahahaha.

Our tree is up a little earlier than usual this year, which is fine by me. It smells heavenly. How are you doing with your hall decking and holly hauling?

Linking up at the Craft-O-Maniac Christmas Tree party!!

Saturday, December 10, 2011

Sweet Enough to Eat

I almost completely forgot about posting this. I've had some sinus headache business going on, and some shopping/sitting in traffic tiredness to sleep away, and then some cleaning up of the junk I tend to leave here and there throughout the week. But now I've laid out my Christmas quilt, and taken some horrible photographs for you. Sunlight, clouds, indoors - it doesn't matter. I'll never be able to consider a photography career.

So...onward! I ordered a few layer cakes (because each was only half size) of Riley Blake's 'Christmas Candy' (hard to find except for a few prints now), and then used the Cluck Cluck Sew Easy Bake pattern (with a few changes), and whipped up the yummiest Christmas quilt you can imagine (fabric-wise--my eyeballed stitching leaves something to be desired, and I tried a new binding technique that left me less than in love, but hey--if things were perfect then it wouldn't seem like Christmas, would it?


It's hugely busy and mish-moshy, but the pink and the lime green and the red, and the white, and the polka dots (!) are so very me and how I perceive Christmas.


The quilting was all straight-lined and easy peasy--about a half inch on each side of the seam (which in some sections is straight through the middle of a larger fabric square). It makes a really neat pattern on the back, and may be one of my favorite quilting patterns.


The backing is a green sheet (that isn't showing as green as it actually is). I like quilting with sheets. Quilt backing is expen$ive, and when I've finished piecing the quilt top I'm not really feeling like piecing the backing. A cotton sheet is a perfect solution for that.


This quilt screamed for red polka dot binding. I don't know of anything that would have been more perfect. I used some that I'm not using in my red and white quilt. I'm not a fan of the actual process of making bias tape, but I do love that perfect finishing touch that it gives as opposed to store bought.

Don't look too closely at the stitching of the binding. It might make you ill. I was too lazy to rip it out and start over (because I was finished at that point). But I will never bind a quilt this way again, that's for sure.


My usual method is to stitch the tape to the front, then flip it and pin and stitch it down in the back. I do the neater stitching on the top so anything icky won't really be seen. I saw a method where you stitch it onto the back, then down to the front that seemed easier. Easier isn't better, and I'm not fond of the outcome as the part that you see (on the top of the quilt) is the part that's wiggly in spots.

Overall, though, I adore it. I love walking by the living room and seeing it draped over the chair. I love the prints. I love the binding fabric. I love the quilting. I love that I can't actually eat it because I have a hard enough time avoiding sweets.


Now I must trot. I have to get ready for church (I love church during Advent) and then we're all heading out for a yummy family Christmas-time dinner.


See you soon, my lovelies!

Linking up here this week:

Friday, December 9, 2011

Orange Windows

Wouldn't orange windows be fun? Not the glass, but the trim? Maybe? No? Ok, then. Anyways, that was the name of this week's quilt block because I think it was a combination of two other patterns...or something. I'm tired and have sinus pressure so you'll be lucky if this is a coherent post.

This month we started with applique, raw-edge applique to be specific. You start with a base square. Then you cut out a bunch of shapes in your chosen fabrics, fuse them to Heat 'n Bond, stick those to your fabric and stitch 'em on down. Easy peasy (easier than my fall pillow I made with the same method--that one was all stops and starts). I am subsequently in love with this block. My fabric layout didn't turn out as I thought it would, but the pattern and the zig-zag stitches make up for it.


I love how you can look at this and see several different patterns going on. But my favorite part by far is the stitching. Wanna know a secret? I've never zig-zagged along the edge of something before so I was a bit nervous about making a huge mess of it. This is stitched in 2 (maybe 3?) reeealllly looonnggg lines of stitching.


When my work was on the left side of the needle it was smooth-sailing, but when it was on the other it got a little wiggly at times. It's weird when you're used to looking at your work on one side of the needle and then you have to switch it up. It makes my brain uncomfortable. But I love it, so here's another photo:


Usually when you turn a quilt block over it's a mess of seams. But when you turn this one over it's just as fun to look at as the front:


Oh you should know you're getting another ziggy zaggy close-up:


There won't be a block this week as our hostess is traveling to far-off lands. Which is good. Because my Lola is in the shop for a check-up. She's not sick, but I figured after two years of almost non-stop sewing she deserved a proper rest and cleaning. I've been pottering around with a few other things I most likely wouldn't have gotten to and been enjoying my crafts. I've finished a bunch of little bits, which you'll get to see shortly. I've got a busy weekend coming up, but I'm going to show you my Christmas quilt tomorrow. It's so yummy looking I could eat it! See you soon!

Wednesday, December 7, 2011

Ding Dong Fail (Kind of...)

Years and years ago my dad's Aunt Ida (I've only ever heard of her - I'm not even sure where she hangs in the family tree) sent us six beaded bells in different colors. They look like this:


When I tell you that I have spent an obscene amount of hours looking for directions for these I am not lying. A few months ago I met with success. I found some ooooold scanned pages that had the instructions for these on some website. I bookmarked them, but when I went to use them the links were dead. Luckily (and almost unbelievably) when I began searching again I found a kit for them! The beads were different but oh well--the colored ones like those above are cheap and easy to find. Here's what the kit bells look like:


Then I got my hands on them. I am not a beader. I like beads. I think they're pretty. I'm envious of people who make functional items out of them. But I'm all thumbs when it comes to working with them. My first attempt I thought was a little too tight and that was maybe why it was a tad misshapen:


The basic idea is there but it's a bit flat-topped. So for the second one I worked a little looser. Giant no-no. This one is almost funny. Look at that one just sticking out on the side, and how lop-sided it is!


At this point I didn't want to invest any more time in something that wasn't working out great so I put them aside. The basic put-together premise is quite simple and a bit fun (though working with that fishing wire stuff you string the beads on is fiddly and annoying). I'm wondering if the beads aren't proportioned properly for this. The long white beads on my aunt's bells are a bit longer than the long gold ones in mine...I'm thinking that's where the problem is. If any of you are beaders I'd love to know any thoughts you may have...

I am determined to make these, though, as I think they'd make really sweet presents. But I'm going to wait until we get the ornaments out of the attic so I can give Aunt Ida's an up close and personal inspection.


For now, they're on the mantle. We have an old-fashioned Santa Claus amidst a sea of holly and greenery and other Christmassy bits...he has a large staff in his right hand (I guess Santa is a shepherd in the off-season?) and now he carries these in his left hand, and you don't even notice the oddness...so not a total fail :)

Tuesday, December 6, 2011

Blocky Stripes Crochet Stitch Tutorial

Here's the stitching pattern some of you asked for :) I don't know what in the dickens this stitch is called. I did not, by any stretch of the imagination, come up with it. I just don't know where I saw it. But it's stripes and the varying stitches make little block looking thingees so there you go. It's a very scientific naming process.


Anyway, if you want to whip up a fun throw, or even a larger blanket, this stitch pattern is a quick one to learn. It's quite simple and only requires you to know, in US terms, how to chain, single crochet (sc), and double crochet (dc). If you'd like to learn to crochet, or need a stitch refresher, the Lion Brand website has some great tutorials to get you going.

OK. On to the pattern.

To make your foundation, you need to loosely chain a multiple of 4 stitches plus one stitch for turning. My blanket is 225 and it's a great throw size. What you chain is up to you and what size you want your blanket to be.

Row 1: in the second chain from the hook, and the next 3 chains, single crochet. Then, do a double crochet in each of the next 4 stitches. Then 4 single crochets, then 4 doubles, and so on until the end.

Row 2: this depends on how many you chained. If you ended with single crochet, you will chain 1, and then sc in the sc, and dc in the dc, all the way across. If you ended with double crochet, you will chain 3, dc in the dc, and sc in the sc, all the way across.

You can see the stitch pattern in this photo pretty well. You can see how the singles and doubles are 'stacked' for two rows, and then they alternate and are 'stacked' for two rows.

Row 3: change your color. The stitches just completed should be single crochets. To make the 'blocks' appear you will now chain 3, double crochet in the next 3 sc, then sc in the dc, and so on, all the way across (you're doing the opposite of the stitch you're working into - if you are working into a single crochet, you'll do a double crochet, and vice versa).

Row 4: Just like row 2--if you ended with dc you'll chain 3 and work your way back across, starting with doubles. If you ended with a sc, you'll chain 1 and work back, starting with singles.


Keep repeating rows 3 and 4 until your blanket is the desired size.

A few notes on this one:
  • Sometimes I wouldn't be paying attention and I'd do the wrong stitch. Usually I found the error by the next row. Instead of ripping it all out if it was waaaay back in the previous row, I would just revert back to what I was supposed to be doing in the first place. The error is hardly noticeable in the finished item (and I've got a few spots like that - one of them is actually in the photo above).
  • I chose to fringe my blanket because weaving in ends is my mortal enemy. But if you love to hide your ends then by all means go for it. 

I know it reads like gibberish, but I'm hoping that once you get hooking it becomes clear. If you have any questions let me know!

Sunday, December 4, 2011

Sugarplum Forest

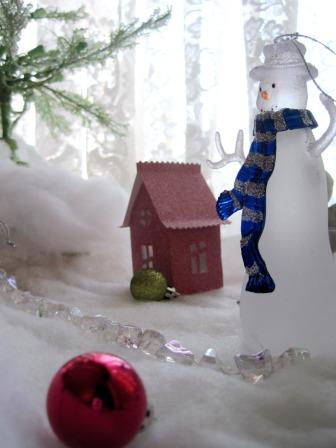
We hauled out the holly last weekend and plopped Christmas on every last surface in the house. My favorite was setting up Sugarplum Forest. We did some shuffling around of things, and this year it is on the bay windowsill in the living room. It's quite simple with lots of random bits strewn around, but it exists as I feel such a forest WOULD if it were real. There's a lot of photos, and nothing is proportional. But it's all sparkly and pretty and that's how I like it.

It's just crisp and wintery and clear and fresh. I waggled this bird near my brother and he told me to stop because it freaked him out. And he said he got over his fear of birds. Ha!

Let's just pretend these are two turtle doves, shall we? And isn't that the most perfect pink pedestally thingee you've ever seen?

 There's lots of purdy colors and sparkle and glitz. And deer butt if you look left-center....

I saw these houses here for Halloween - but I immediately thought Christmas. Perfect for sugarplum elves. I found the glitter stock at Target for $1/pk of two. Compare that to $2/sheet for the super-rigid Martha Stewart stuff.

My sister doesn't totally get my complete and total love for Christmas, and how I can just sit and make MORE Christmas stuff. She walked in on me making these when I had glitter on my nose and pretty much all over the kitchen table and said...well....here's the conversation:

Her: Why? For what?
Me: Sugarplum forest.
Her: Ok, but why?
Me: For the sugarplum elves.
Her: Oh, you found little sparkly elves??
Me: Nooooo...you don't SEE the sugarplum elves. You just know they're there by their houses.
Her: Oh my. You've crossed into an entirely new realm.

I don't think she meant that in a good way....


I just love it with the lights on before it gets too dark outside.


Glitter and sparkle make everything better, especially at Christmas :)
And pursuant to a few comments/emails--I'm working on writing out the afghan stitch pattern. It's easy-peasy, but I'll get you specifics mid-week (probably).

I'm linking here this week:

LinkWithin

Related Posts Plugin for WordPress, Blogger...