

This is a great project for when you're sitting in front of the tube thinking that you should be more productive. Or making with your kids--I remember making shapes out of felt and sewing them together and stuffing them with cotton balls--they had that adorable homemade look that things like that have when they're made by kids who have never used a needle and thread before. At least that's what I tell myself. ANYway...
Here's what you'll need (aside from the phrase you want to stitch):
~ Felt (I used the cheap stuff and just picked colors I thought looked nice and fallish together)
~ Embroidery floss (you can use thread, but I wanted the stitching to be in your face)
~ Fiber fill
~ Twine, string, fishing line, or something to string the letters on.
~ Printed letters in a font and size you like (I used Cooper in 425--I thought it gave a good shape)
~ Scissors and a needle
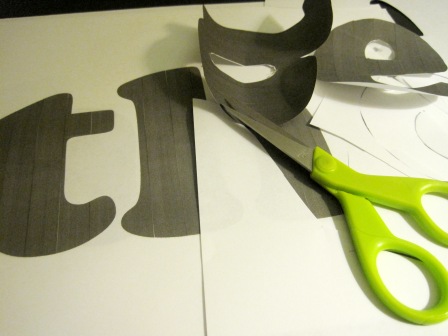
First you'll want to print out and cut all your letters. Here's a picture just because:
Decide on how you want your colors to be arranged:

Trace your letters onto the felt (I used a disappearing marker but it didn't disappear). You need 2 of each letter, so I just put the inky one on the bottom when I went to stitch.

I was able to get 2 letters in duplicate out of each piece of felt, but depending on your letter size it may be more or less. Then cut out your letters.

Next you are going to do a blanket stitch on all the letters. I haven't done that since 8th grade Home Ec, so I used this tutorial to get going. I made my stitches a little shorter than 1/4 inch. For the letters that have a hole inside you are going to want to do that part first and then do the edge of the letter. Stuff as you go.

When you're done take a length of twine (or yarn, or whatever you're using for this part) and run it through the letters. The stitches will move a bit to allow you to run the twine behind them and through the letter. As you go along, hold it up to make sure your letters don't flip upside down--to keep this from happening make sure you're not running the twine through the letter too low.

Hang it up, arrange your letters how you like (they'll slide along the twine), and do what it says. I'm thankful I only have one letter with wonky stitching.
Have a good week folks!
OH!! Have you entered my giveaway? You have until November 11th--click here for the details!
Linking here:
Skip to My Lou *** Sumo's Sweet Stuff *** Pinkapotamus *** Ask Anna *** Sew Can Do *** Craftomaniac *** Homemaker on a Dime *** C.R.A.F.T. *** Running With Glitter *** Sarahndipities *** Sugar Bee Crafts *** All Thingz Related *** Creative Itch Boutique *** Funky Polkadot Giraffe *** Chef in Training *** Tip Junkie *** My Girlish Whims *** Sew Much Ado *** Blue Cricket Design *** Free Pretty Things for You *** Tea Rose Home *** Someday Crafts *** Somewhat Simple *** Fireflies and Jellybeans *** Suzy's Artsy Craftsy Sitcom *** Today's Creative Blog *** Between U and Me *** Creation Corner *** The Shabby Nest *** While He Was Napping *** Tatertots and Jello *** Be Different Act Normal *** To Sew With Love

This is really very nice and tasteful! And I love the colors! You are so talented!
ReplyDeleteHave a great week!
Ann
They are cute and yes, they really do have the homemade look - in a good way ;-) However, we "don't do" Thanksgiving here...what now? Have a geat week, Love from London xo
ReplyDeleteI love this!!!! I hope you'll come link up to TOO Cute Tuesday tomorrow!
ReplyDeletehttp://funkypolkadotgiraffe.blogspot.com
I love your banner! The blanket stitch on the edges is a great touch.
ReplyDeleteYou just gave me a Christmas banner idea! :D
ReplyDeleteJust too cute. I just love about ANYTHING felt, and this is really nice. Thanks for sharing.
ReplyDeleteSo cute! I love felt, it's so easy to work with. Thanks for sharing, found at Be Different . . . Act Normal link party.
ReplyDeleteThis is so cute - love it!
ReplyDeleteWhat a lovely banner - and such a great sentiment too! Your instructions and photographs are wonderful as well.
ReplyDeleteLOVE this garland :) come on over and link up to MMM !!!
ReplyDeleteThank you!! i love it. (and by the way, thanksgiving is always the last thursday of november ;-) ). we don't usually do thanksgiving over here, but i think we will have something special this year, to thanks for all the blessing of our lives. thanks again for sharing. Love from France...
ReplyDeletevery cute!
ReplyDeleteYou have the cutest ideas on here! Impressive! I am loving your blog!
ReplyDeleteI saw something similar on the Anthropologie catalogue that I want to make! This is great!! Join us at our party and link up @ InspiredHoneyBee.blogspot ... I'm your new follower xoxo Debbie
ReplyDeleteThis is perfect! Thanks so much for the tutorial, I am definitely pinning it :)
ReplyDeleteVery cute! Looks like a fun garland to hang for years to come!
ReplyDeletemakingitfeellikehome.blogspot.com
I've been thinking a lot about the bunting I really want in my home for Thanksgiving...running out of time over here so it may not be done this year b/c I can't decide on how i want to do it but thanks so much for sharing...I love this! Visiting from TRH Linky
ReplyDeleteI just love blanket stitch and bunting.
ReplyDeleteLove, love, love it! Soo adorable and such a simple and festive idea for Thanksgiving!
ReplyDeleteThanks so much for sharing with the Pink Hippo Party!
I wish I had seen this sooner, it is perfect!
ReplyDelete